Lock Code Manager
Any easy way to add and remove lock codes to/from one or more locks on your hub
Lock Code Manager
Installing Lock Code Manager
-
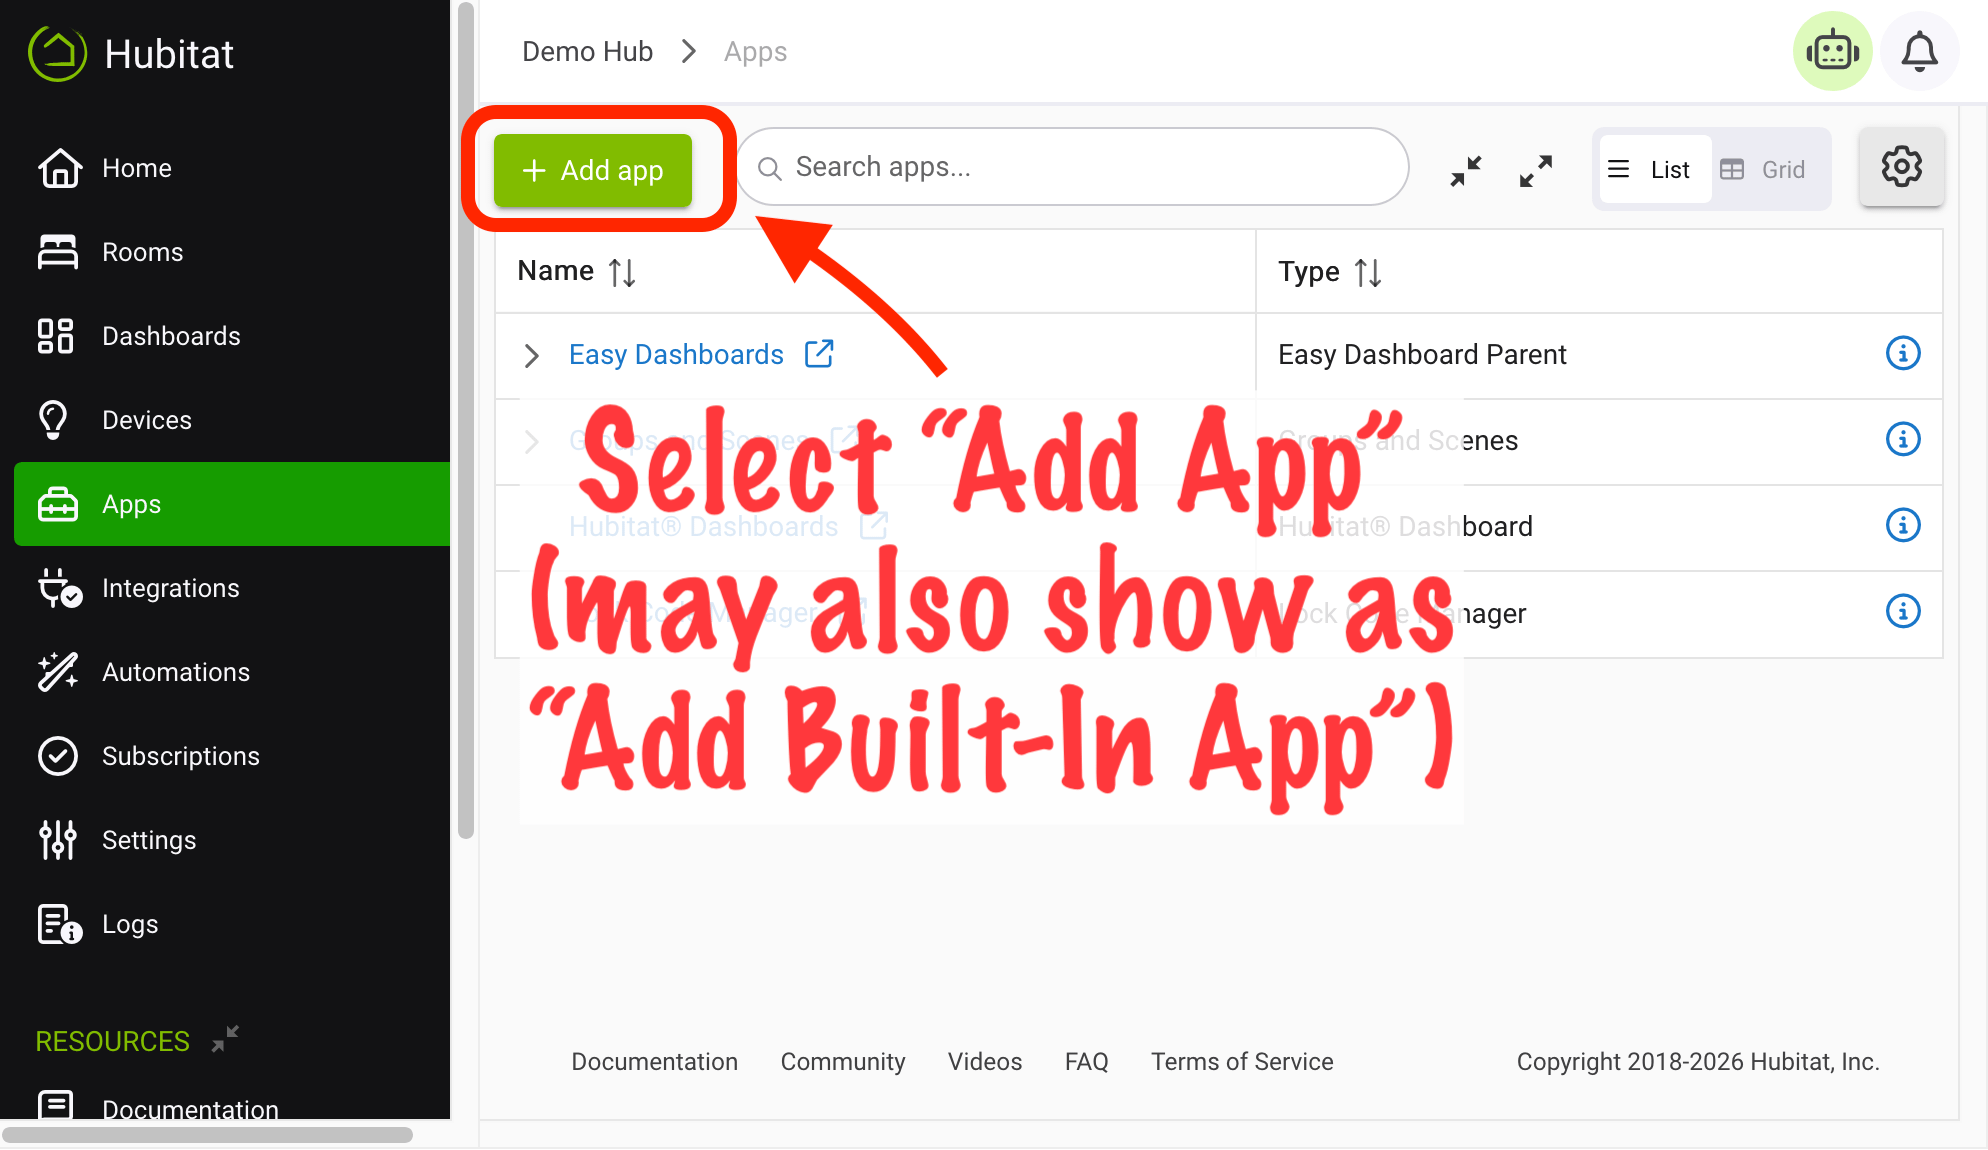
From the sidebar of your hub, select Apps and then Add App or Add Built-In App:
-
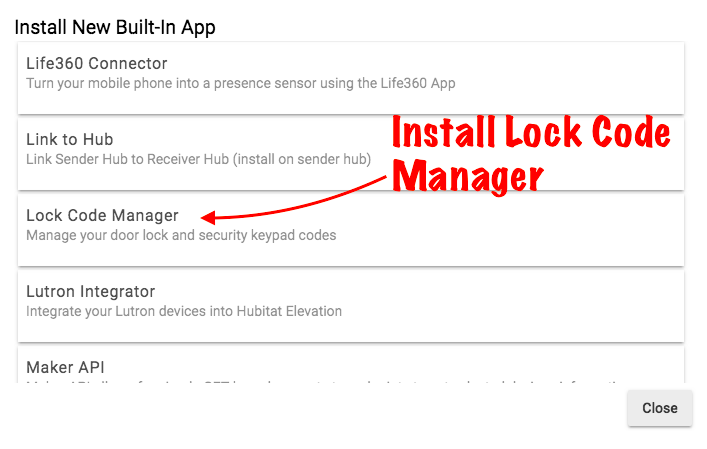
Choose Lock Code Manager from the list of Hubitat Elevation built-In apps.
Renaming users
- On first run, Lock Code Manager attempts to automatically import existing codes from your locks and keypads. If no existing codes have been imported, an option to manually retrieve codes will appear.
- NOTE: Please remember that while locks may support up to 8 digits, most standalone keypads only support 4 digit codes. Code length will vary by device; consult your device manual for supported options and how to change.
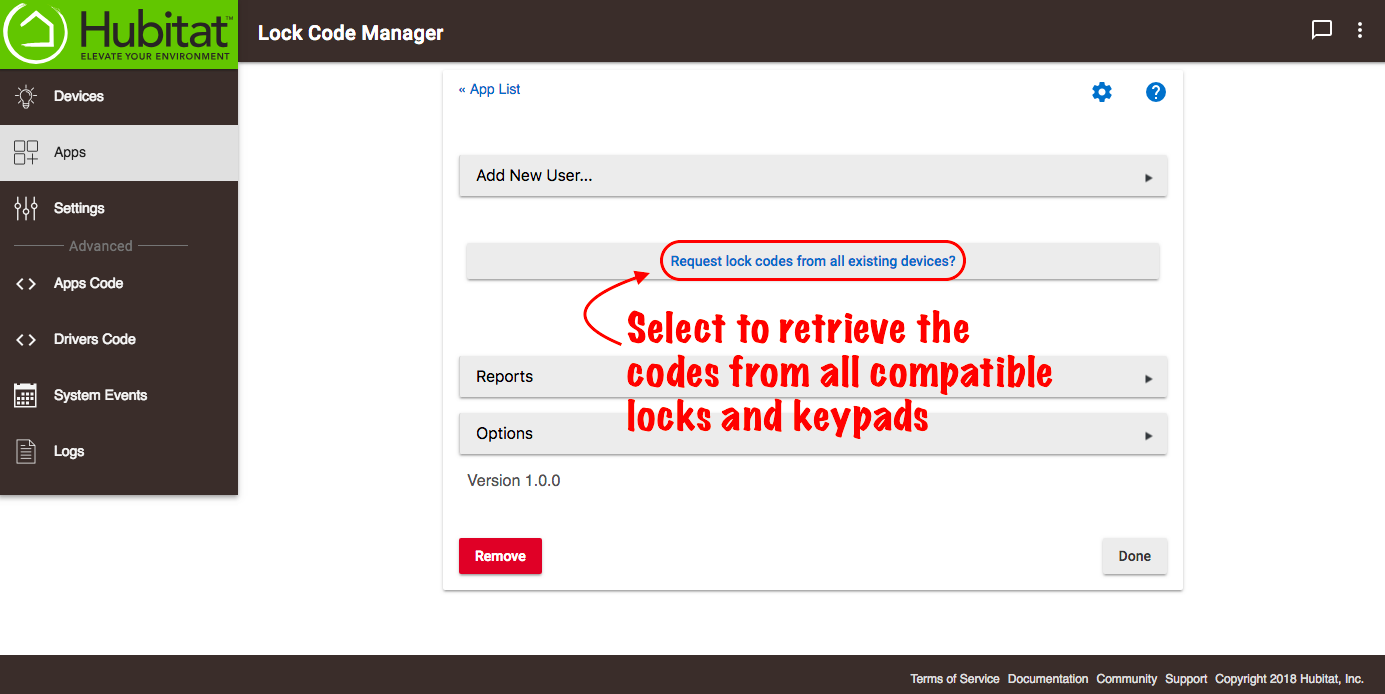
- Imported codes will not have names associated unless programmed via the driver in advance. Lock Code Manager allows you to easily assign and change names.
- NOTE: Some locks, including Schlage locks we have tested, do not allow the export of any existing codes. To use Lock Code Manager with these locks, it is recommended to delete the existing codes on the lock and instead enter them via Lock Code Manager or the lock device detail page so they will be readable by Lock Code Manager.
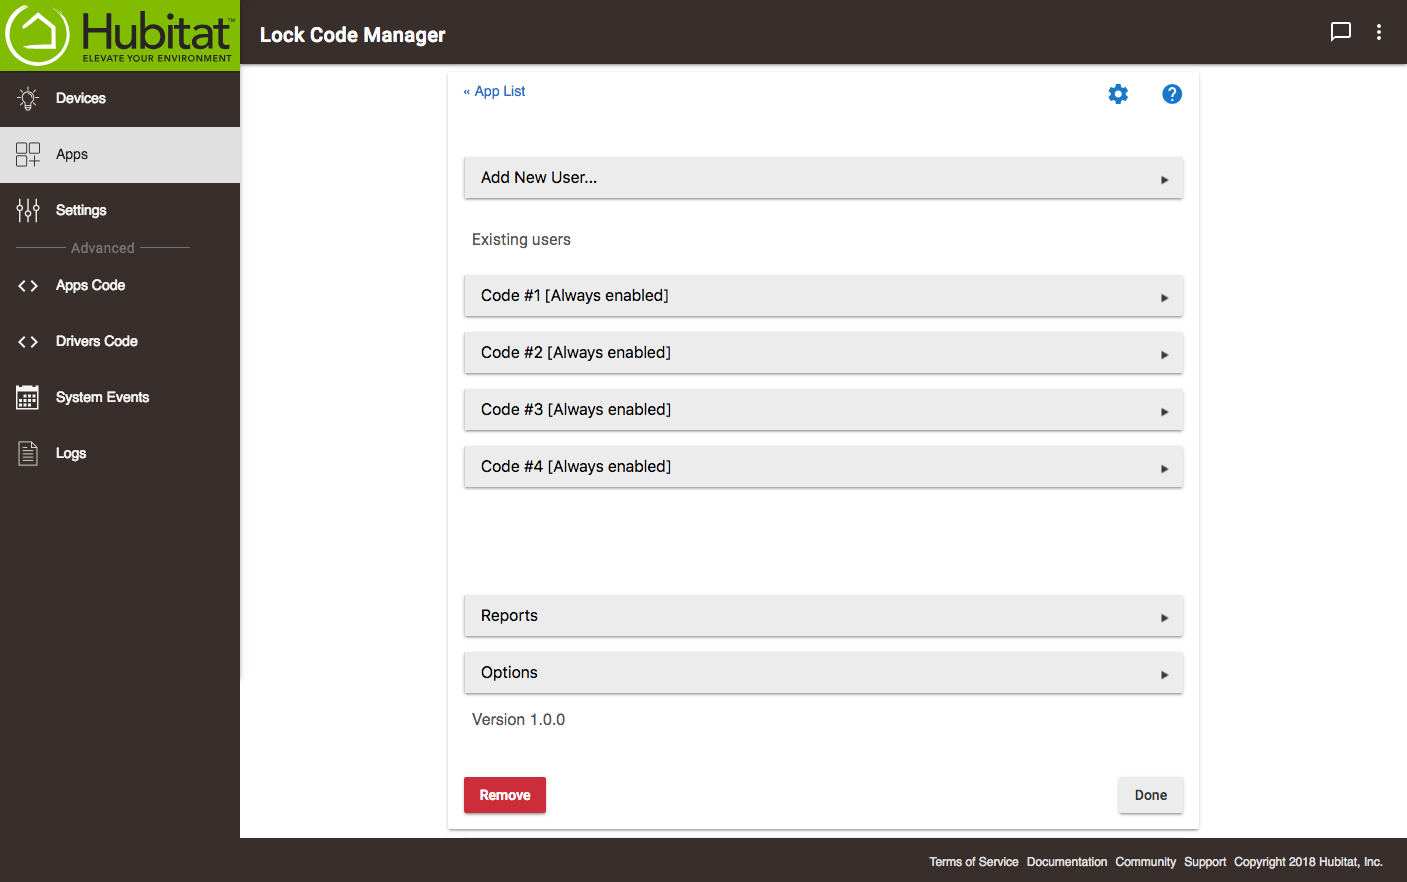
- Select the slot (or username) you would like to change. On the next page, modify the name under Name of this user, then click/tap the save (arrow) icon at the far right of the text field, or click/tap a blank area on the page to exit the text field.
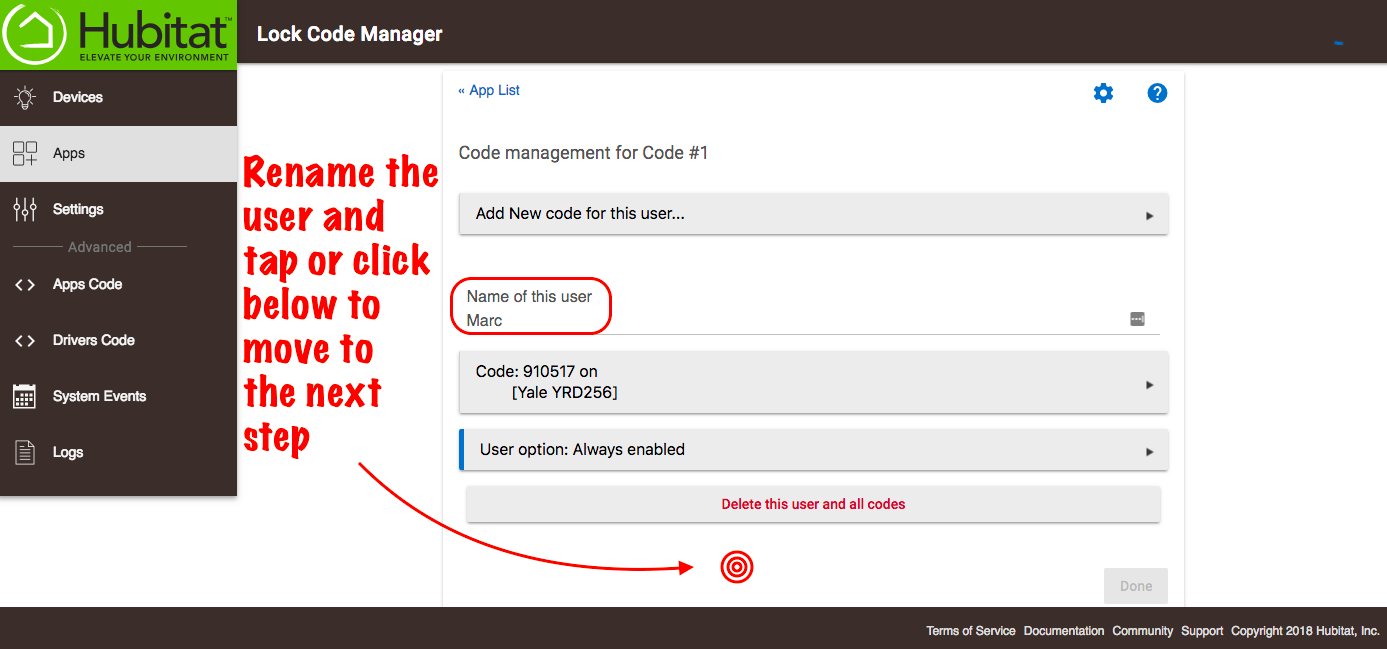
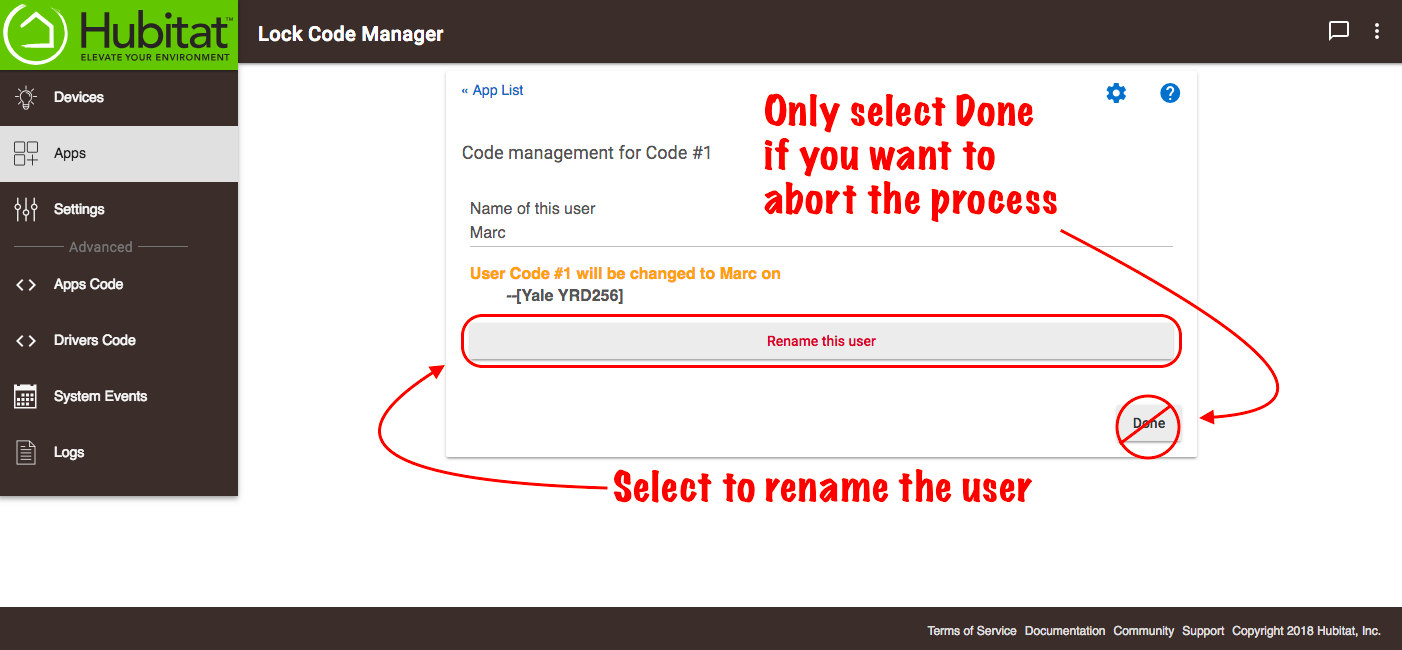
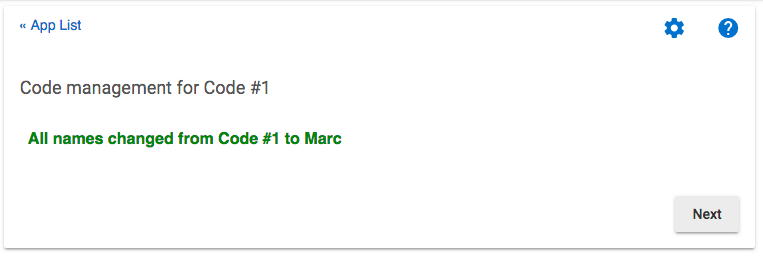
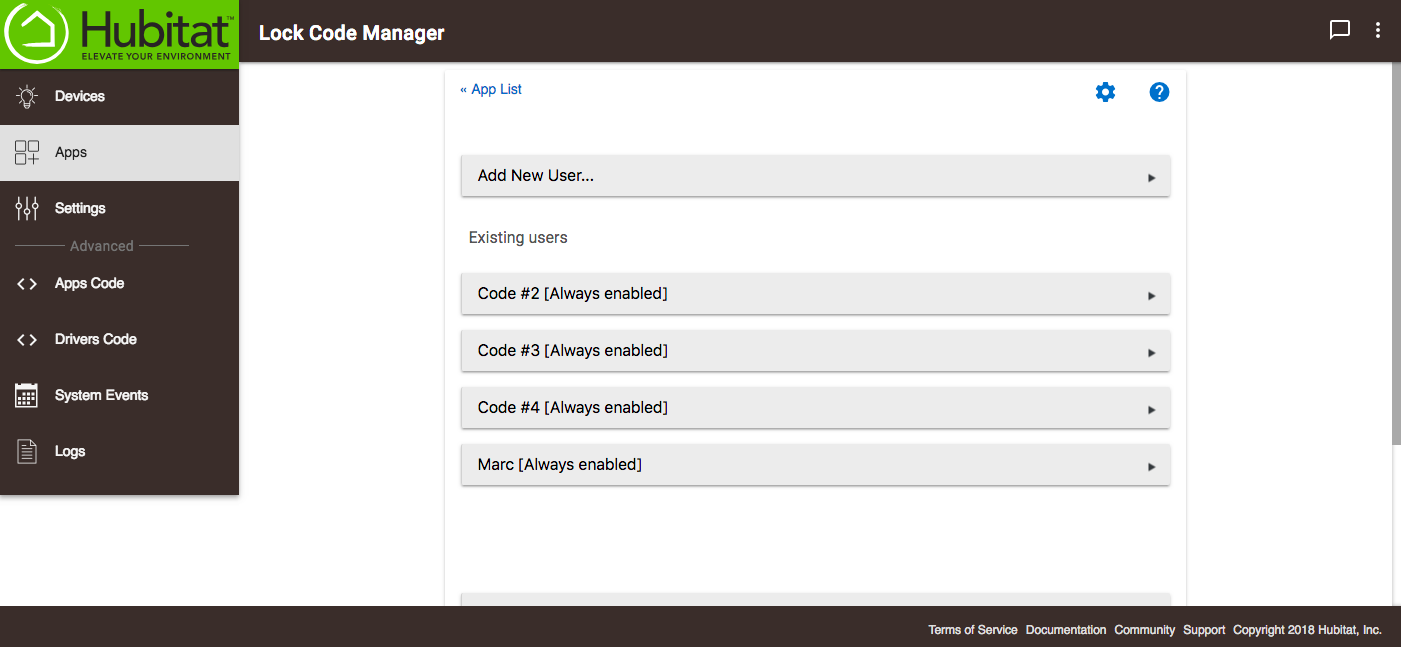
Select the Rename this user button to complete the process and rename the user. Do not select the Done button unless you want to cancel the process.
Lock code encryption
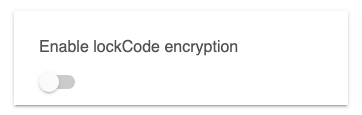
You have the option to Enable lockCode encryption in the lock driver. This is allows codes to be hidden from view in the logs, but Lock Code Manager will still be able to read and make changes to the lock codes.
- NOTE: If you are migrating to a new hub, turn off Enable lockCode encryption in your lock device detail page prior to saving the backup for migration to the new hub. The encryption key cannot be transferred to another hub, so Lock Code Manager (and any other app) will no longer be able to read the codes. You can turn on Enable lockCode encryption on the new hub once the migration has completed.
Assigning and changing user access privileges
-
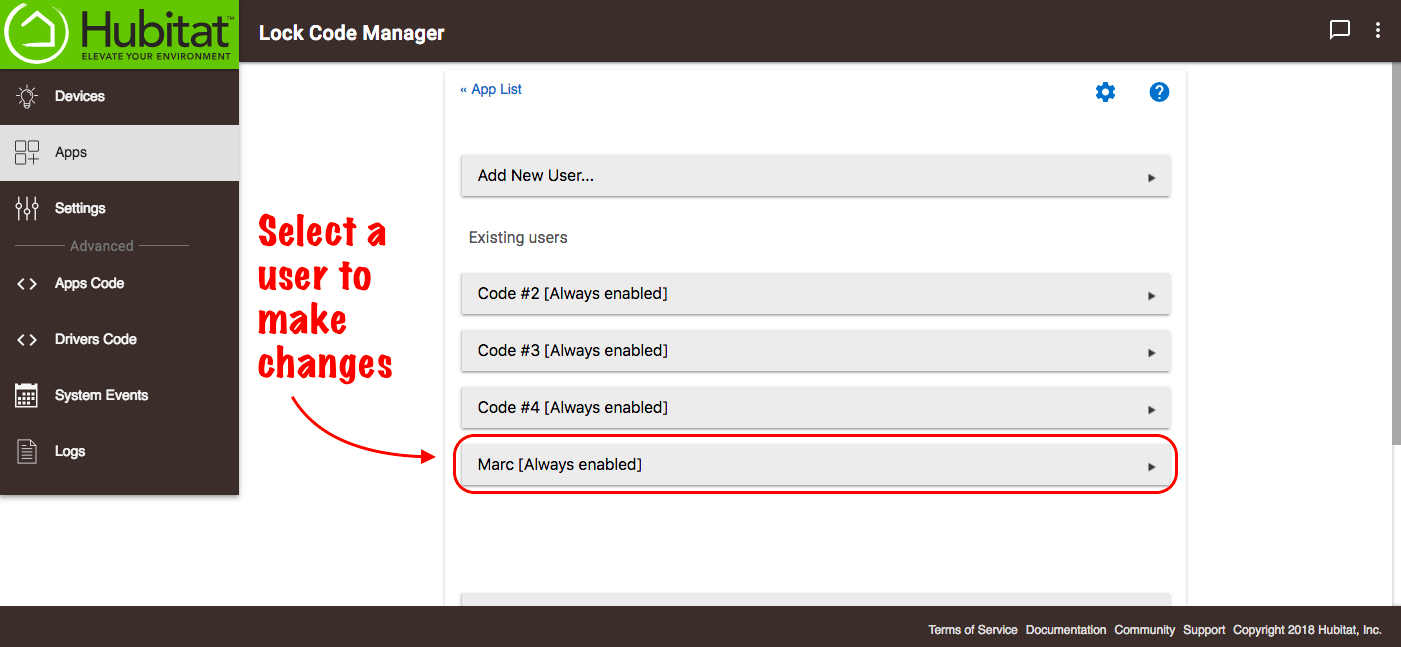
To change a user's access privileges, select the user name from the list of existing users.
-
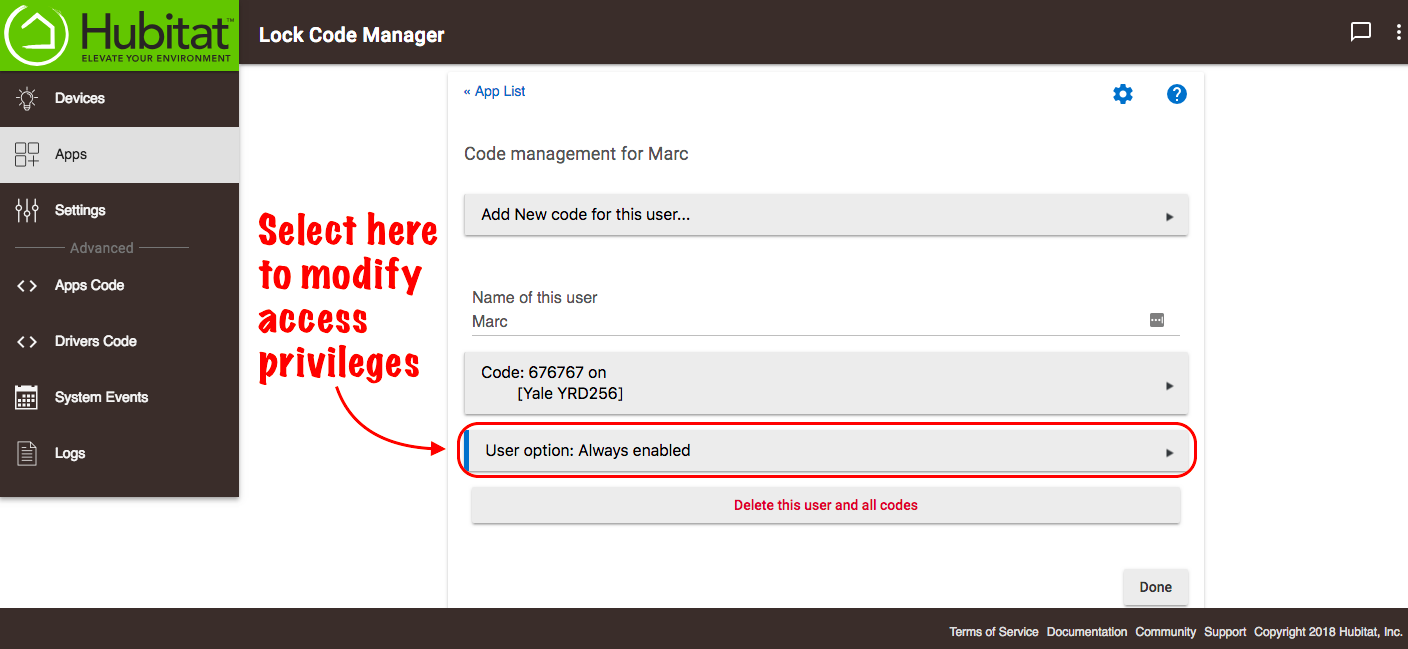
Select User option... to modify privileges.
-
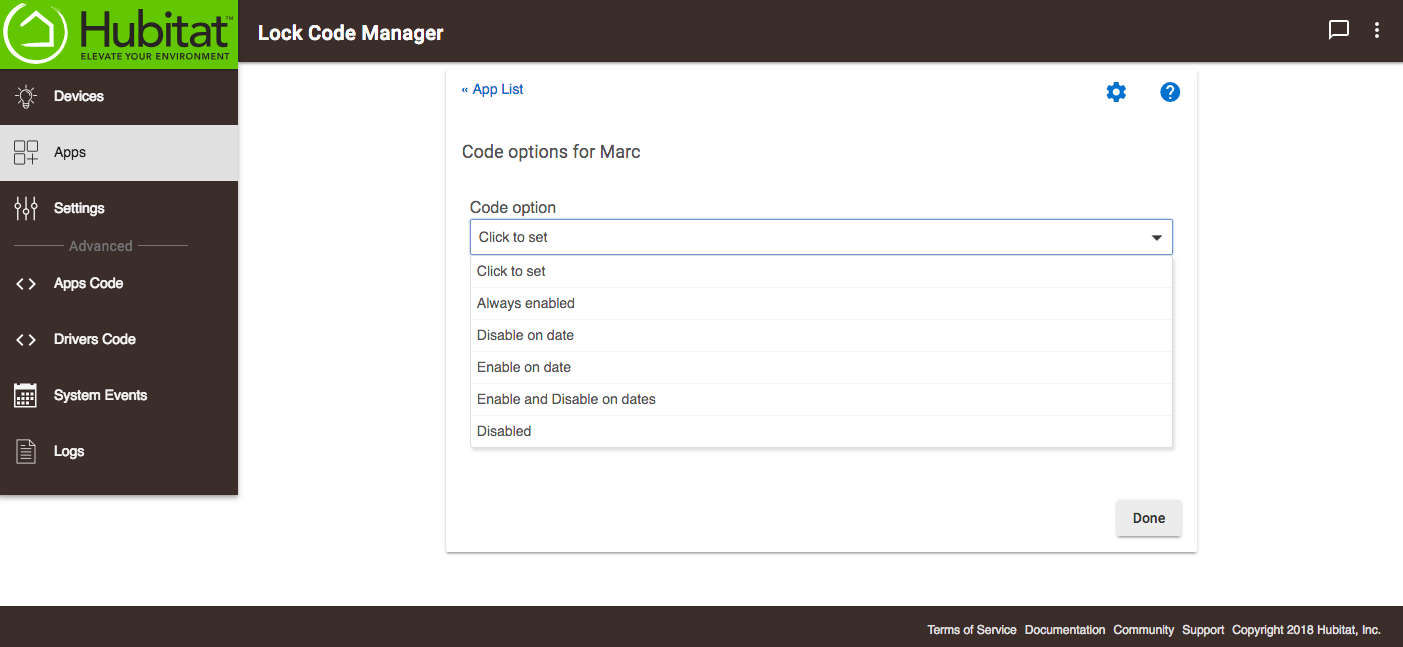
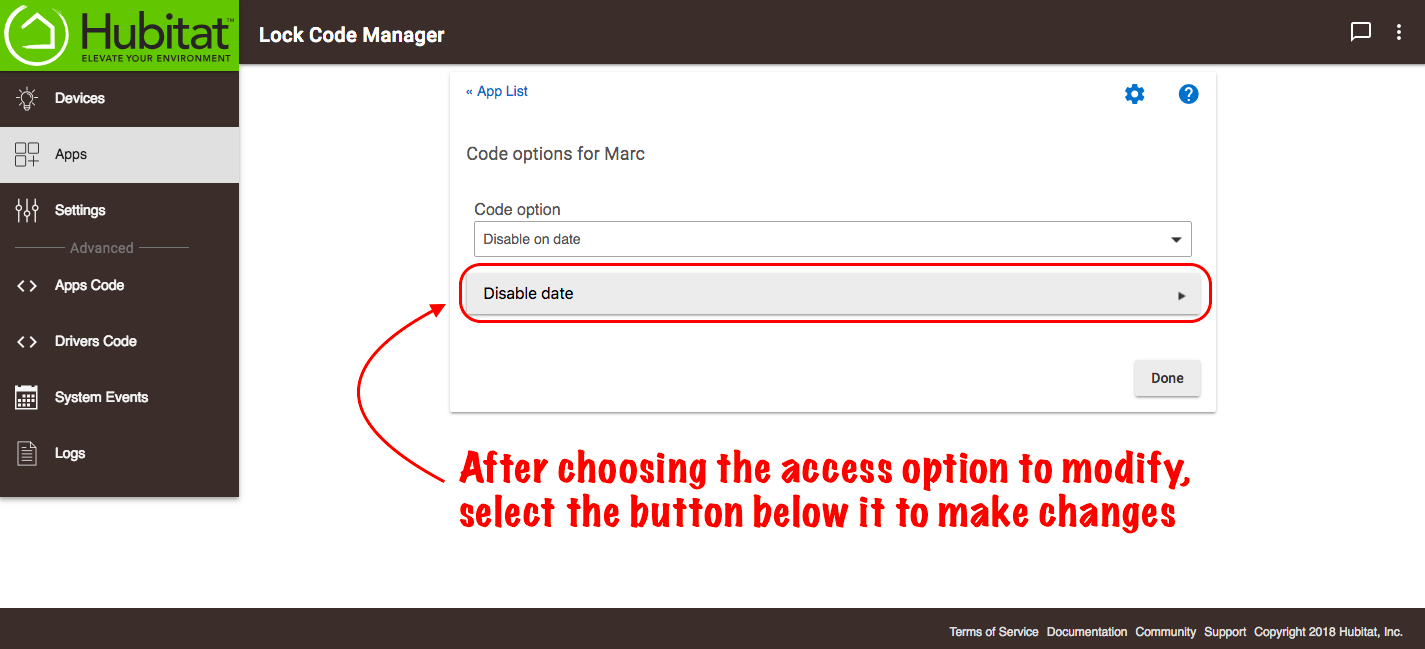
Once an option is selected, a button with the option name will appear below it.
-
Select the button to enter the settings for the user's access privileges where applicable.
-
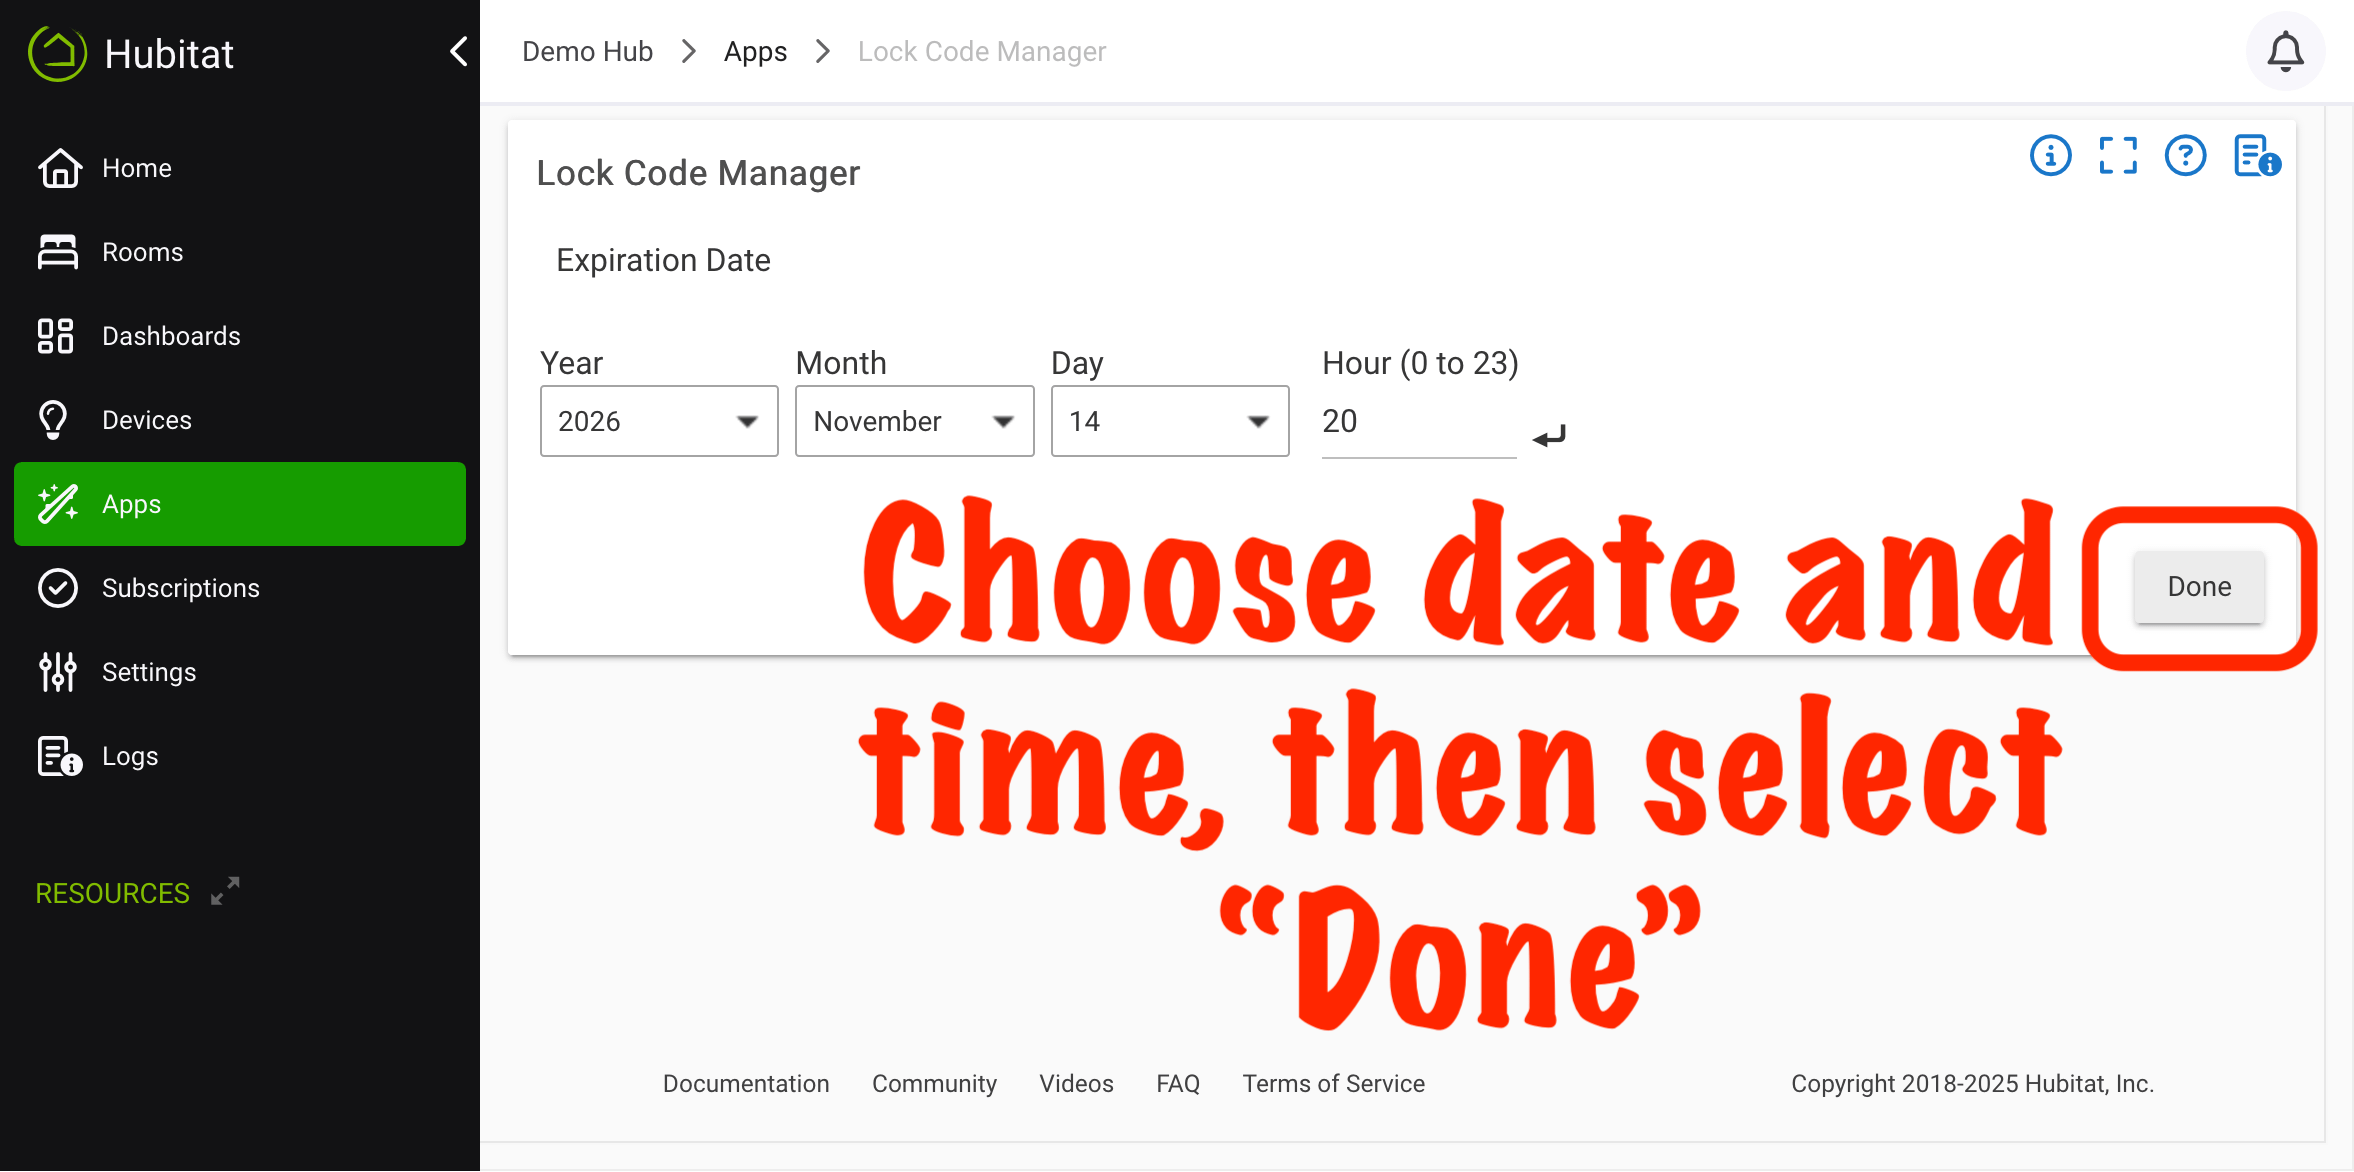
Set the parameters for access. For example, this user's access shown below will expire on November 14 at 8 PM. Select the Done button to continue.
-
Select the Update user code options button to make the change to a user's access privileges. (Do not select Done on this page unless you want to cancel your changes.)
-
Select Next to return to the main user code page.
-
Finally, select Done to finish saving your new options.