Apps Page
Learn how to use the "Apps" page on your Hubitat Elevation hub
Apps Page
The Apps, Integrations, and Automations pages, acessible from the sidebar, allows you to see a list of apps (also the generic term for "apps" that fall into any of these categoires) currently installed on your Hubitat Elevation hub as well as install new instances of any built-in app or already-installed custom app code. Apps are categorized into one of these three types and will appear only in the maching list. (Tip: if you aren't sure where to find a particular app, use the search box and see if any matching app names are found in other categories — you'll see a note below the search results if so.)
Examples of built-in apps include Motion Lighting, Basic Rule, and Rule Machine. Things you can do with these apps include turning lights on or off based on motion, sending notifications in response to certain events (e.g., door opens), or pretty much anything you can imagine as long as the devices you want to automate are added to your hub.
For information about built-in apps themselves, see: Apps/Integrations/Automations Documentation.
Add Built-in Apps
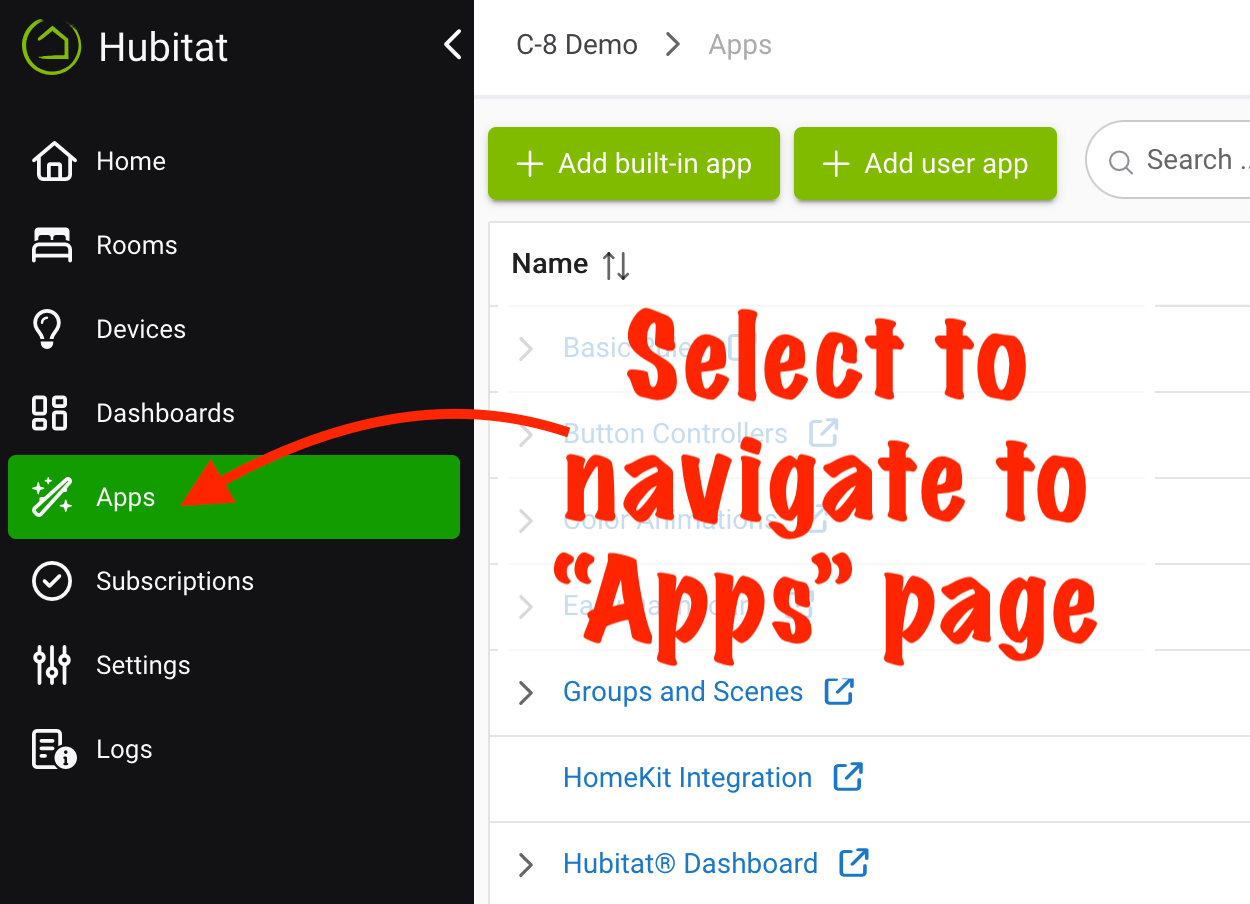
- Select Apps, Integrations, or Automations from the sidebar, depending on which type of app you are trying to add. For example, to add an app categorized under the generic "App" category (similar steps apply to the other categories):
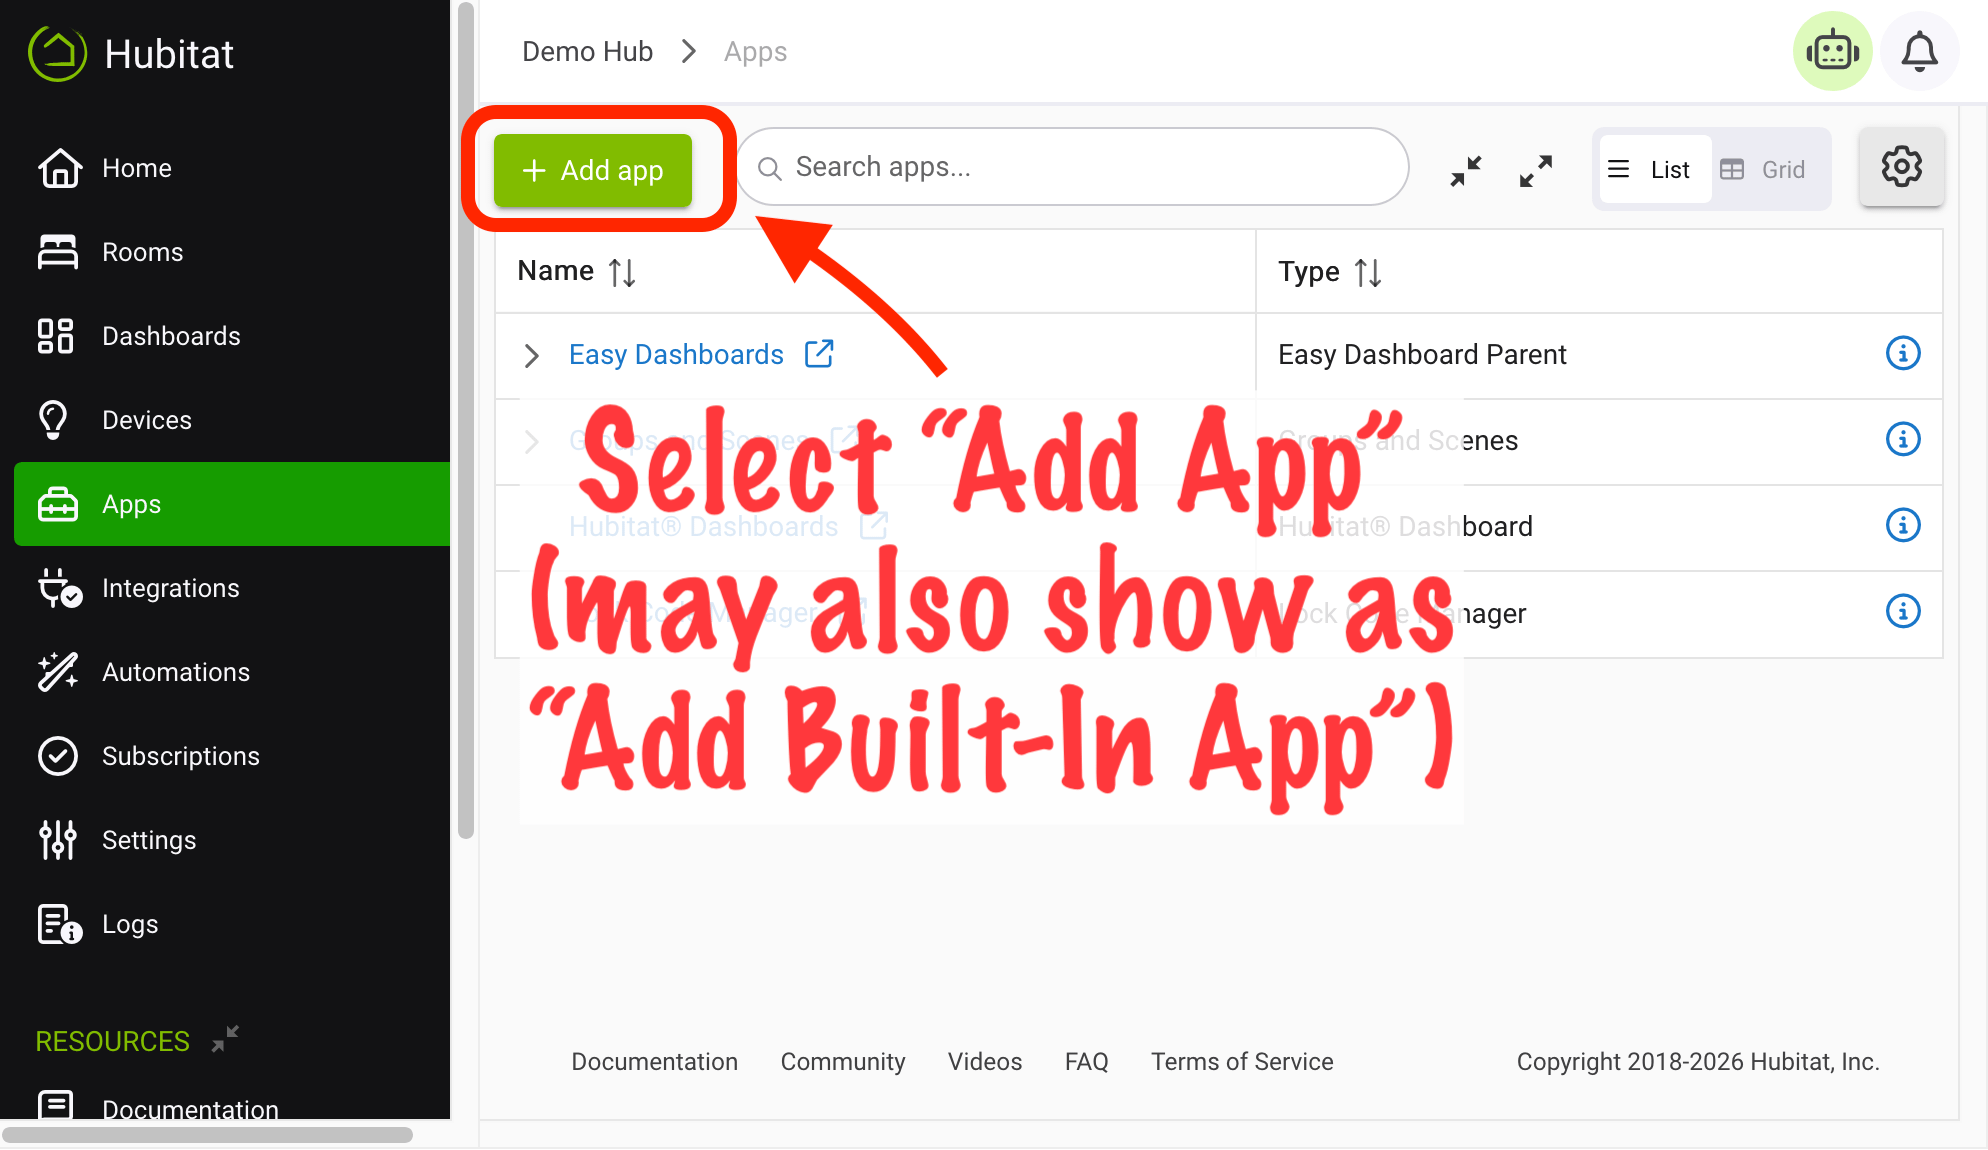
- Select +Add Built-In App.
- Select the app you wish to add from the list that will appear.
- You will now be in the app and ready to use it to create automations, integrate devices, or control your hub with buttons or Dashboards.
- The options presented after this point will vary from app to app. You'll find documentation for the app you selected in the App Documentation page.
- For information on installing and adding user-created apps (custom code) please visit the Apps Code document.
App View Styles
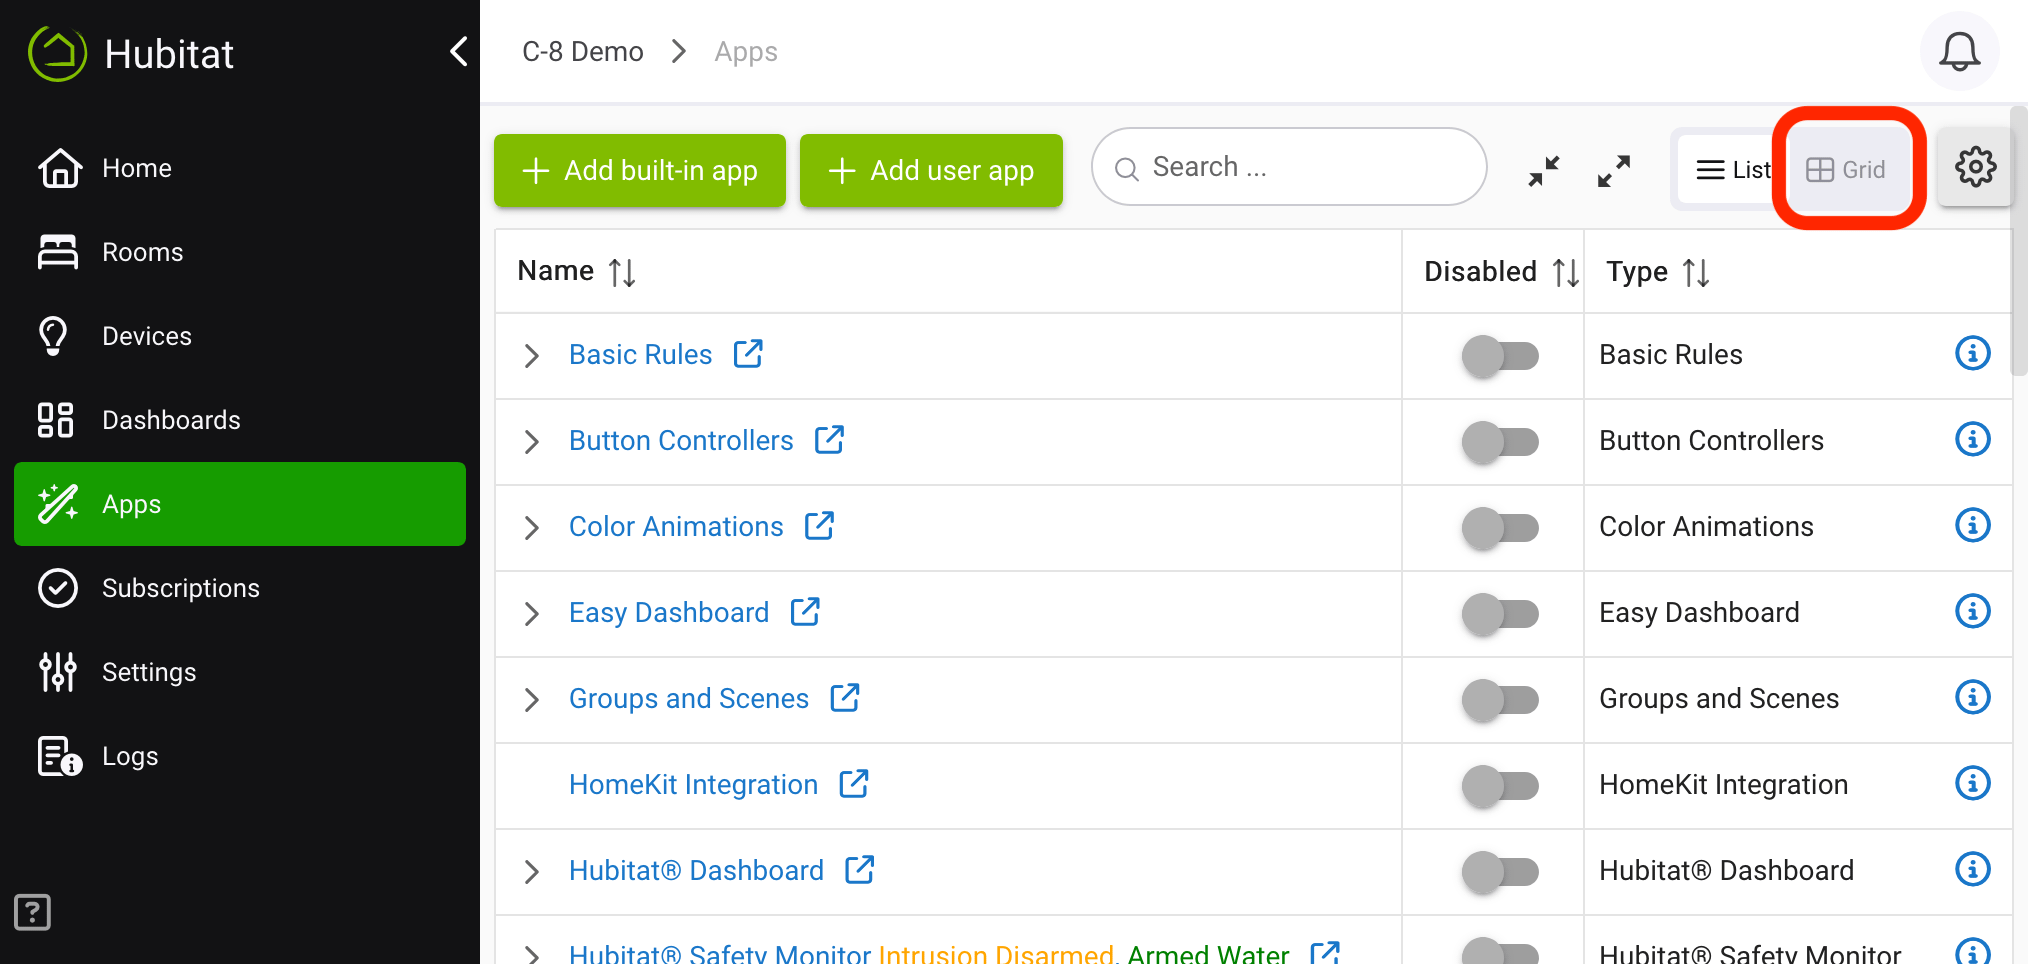
To change the view type between List style and Grid style, select the appropriate icon at the top right of the Apps, Integrations, or Automations page. The options are list view (default for desktop):
and grid view (default for mobile):
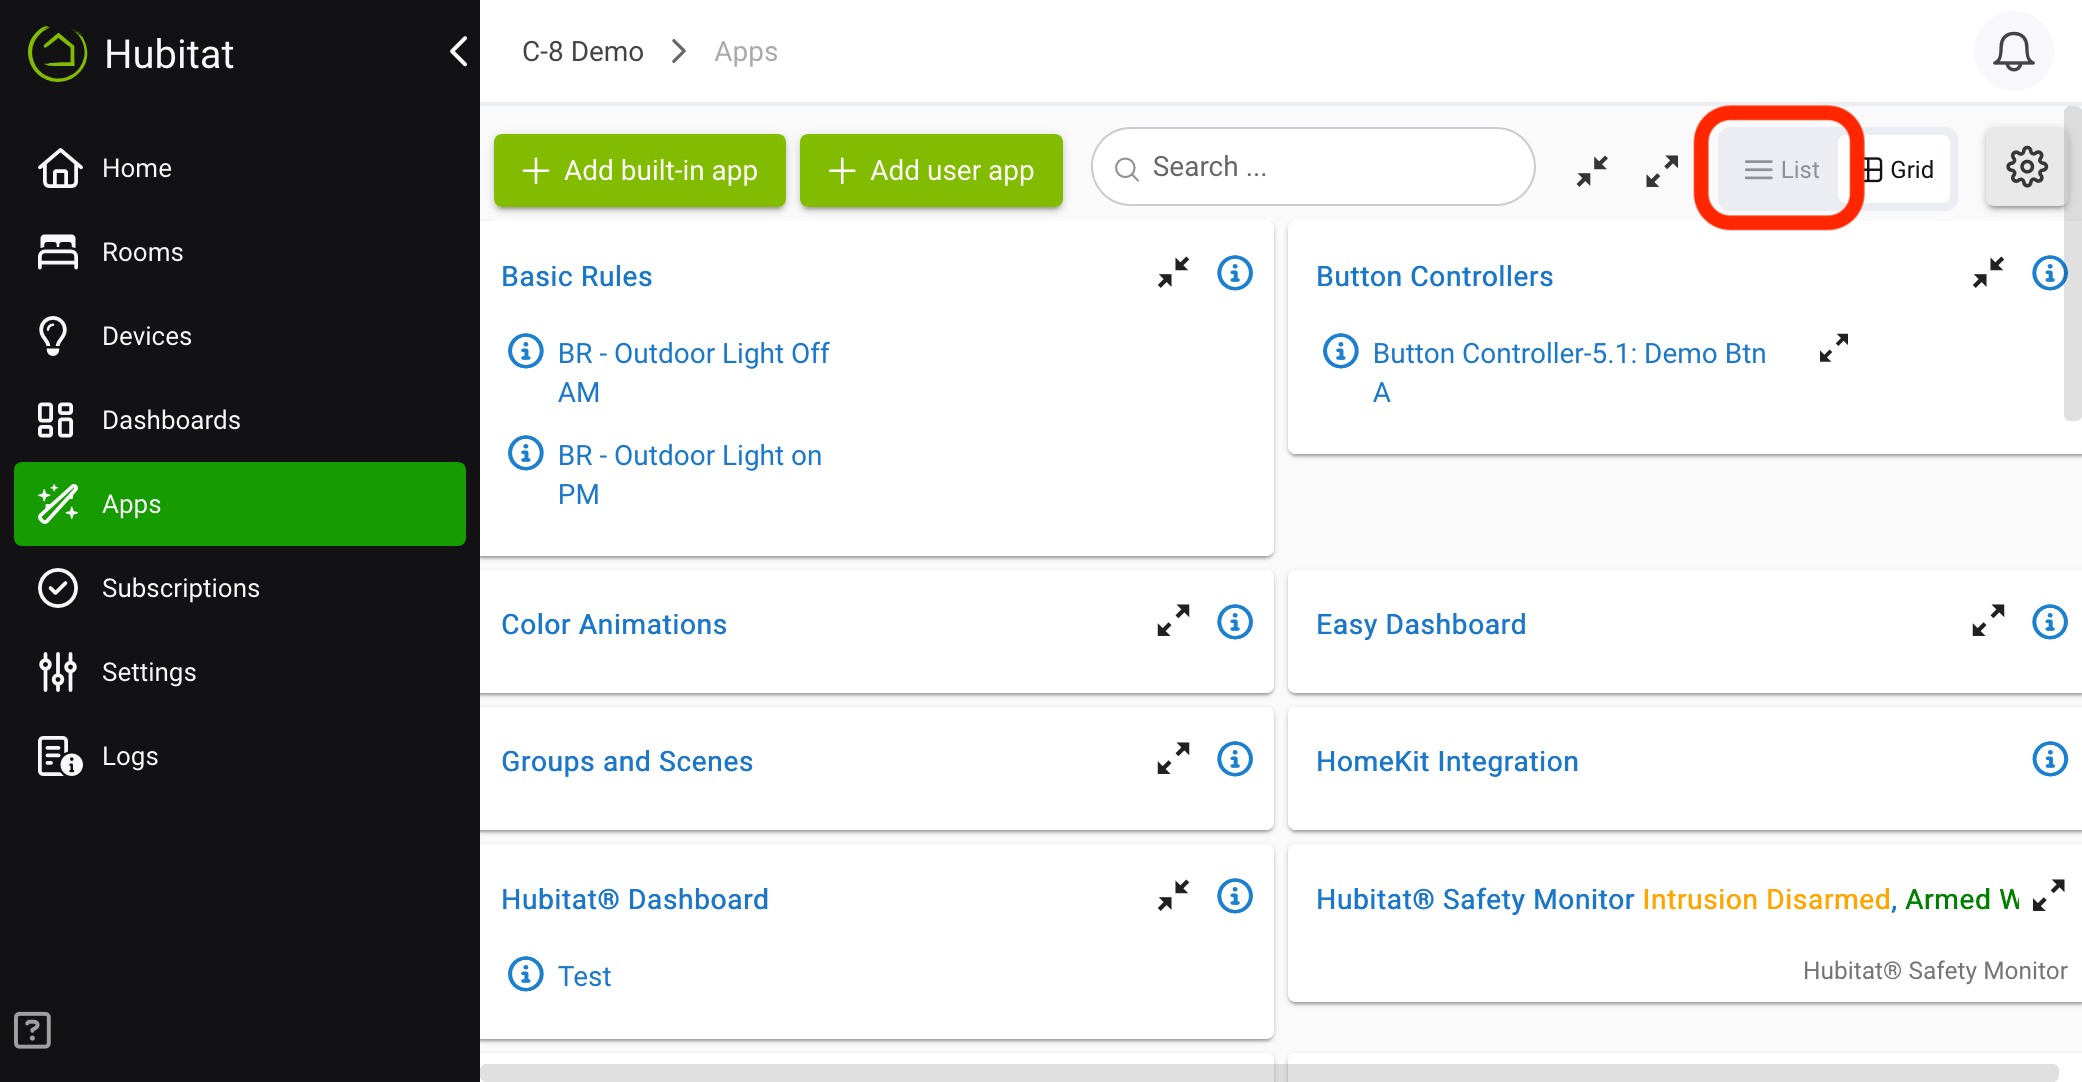
The toggle at the top shows the current view and lets you switch between them (e.g., select List if currently in grid view to switch to list view, as in the above screenshot).
Apps, Integrations, and Automations Pages
When you load the Apps, Integrations, or Automations page on a new hub, it may look similar to the below (just likely with fewer apps installed since you have not installed any yet). To install a new app, select Add App or Add Built-In App (labeled H below) from the upper-right corner of the Apps page — or th esimilar Add Integration or Add Bult-Integration or Add Automation or Add-Built-In Automation button on the Integrations or Automations pages:
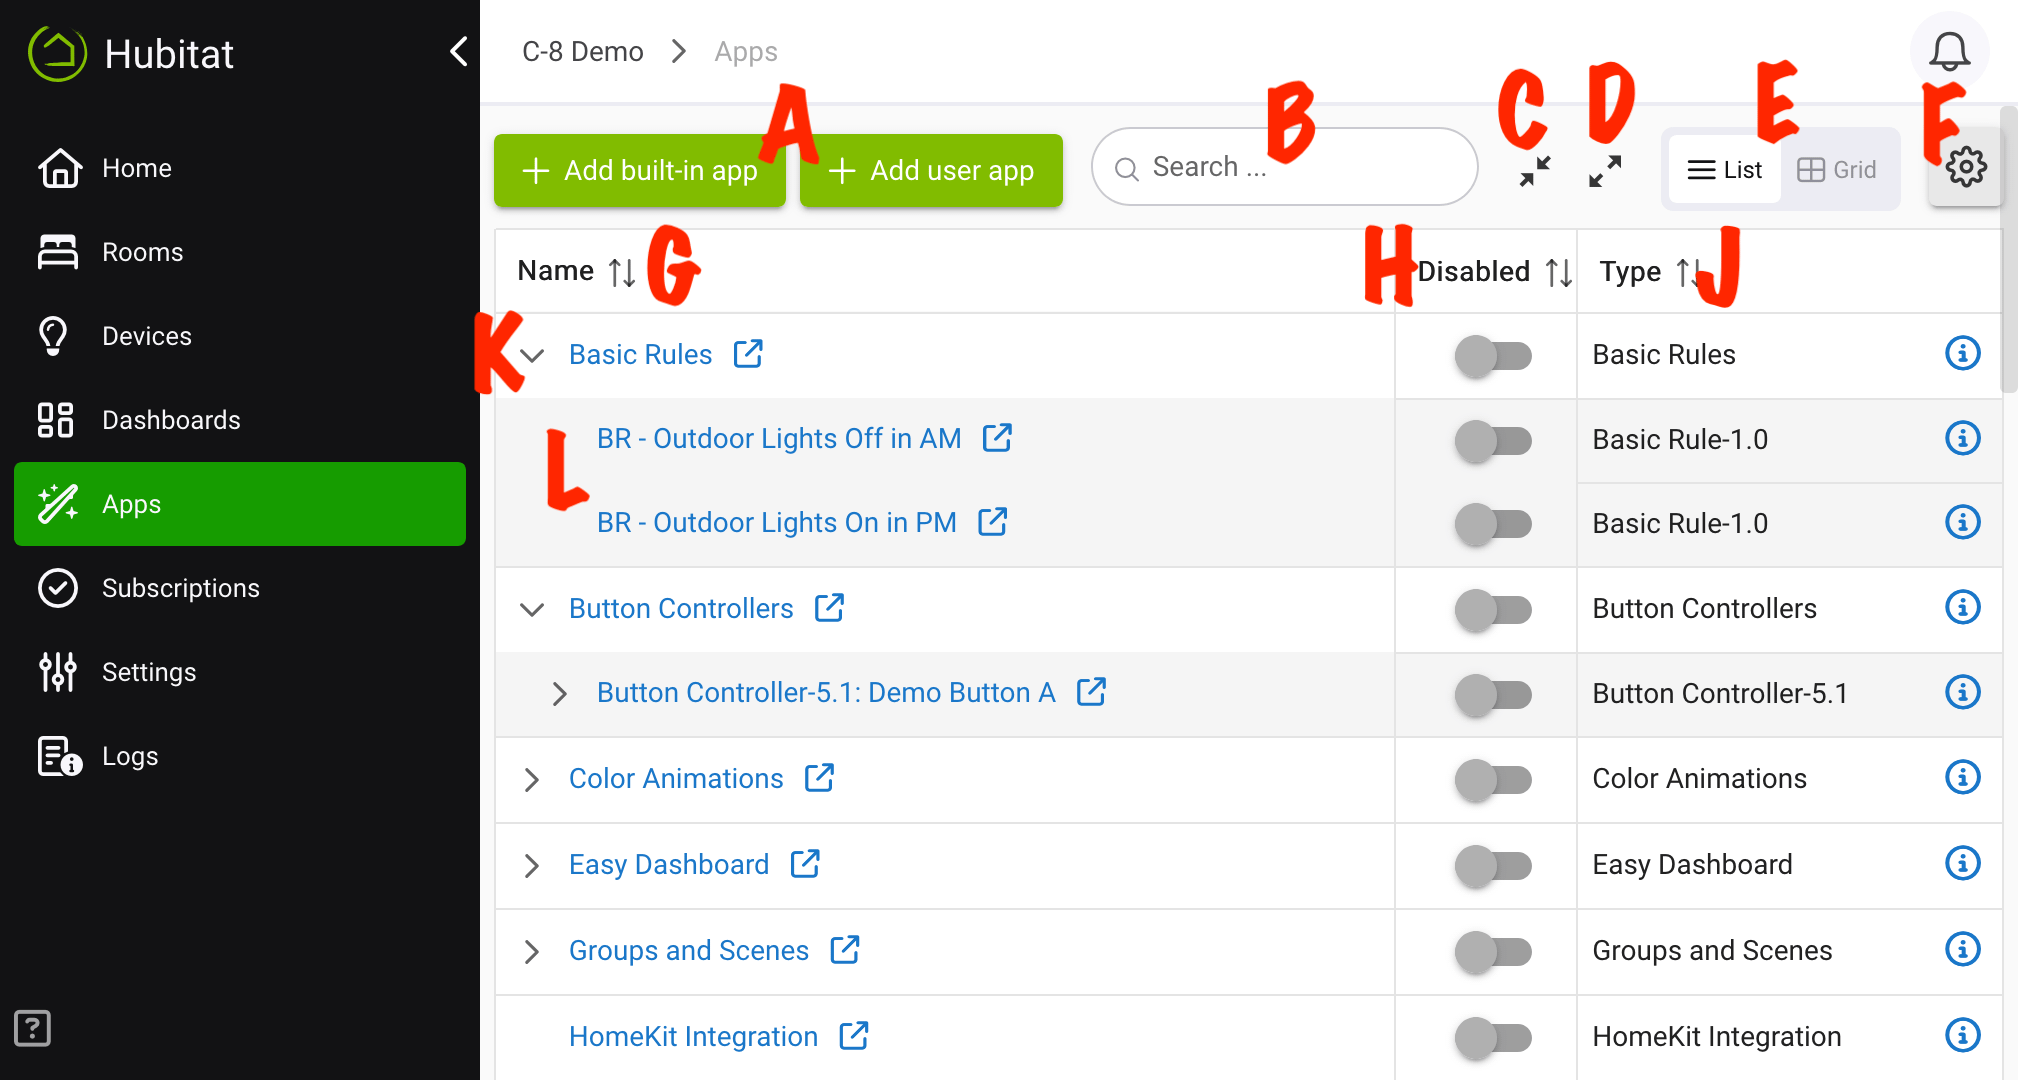
This page also dispalys information about installed apps, integrations, or automations. Columns may vary depending on your display settings options (see below):
- A: App status icon (select to view the App Status page showing internal settings, state, scheduled jobs, and other details about the app; this is generally only useful if you are developing an app or troubleshooting with a developer)
- C: App name (sometimes this is set by the app itself; others offer the option for you to edit the app name)
- D: App type (the name of the app as specified by the built-in or custom app code, sometimes including a "version" as part of the name that may be helpful for troubleshooting)
- E and F: In this example, "Button Controllers" is the parent app (E) that has one child app (F); this terminology can be helpful to know. Often, parent apps will have more than one child app.
- G: Type text to search table and filter results to only those where at least one column in that row contains the specified text; use the Clear button to remove the search filter.
- H: Select to switch between list view (pictured) and grid view.
- J: Display settings, which allows you to hide or show certain columns in list view or switch between list and grid view.
- K: Collapse child apps so only parent app names are visible in list
- L: Expand all child apps so parent and all child (and grandchild) apps are visible in list
- M: Select to add an app to your hub from the list of built-in apps
- N: Select to add an app to your hub from the custom (user) apps you have added to your hub; this button will not be visibile if you have not added any such app code.
TIP: Can't find an app you installed? If you are not seeing apps that you think you should in the list, make sure you have the "parent app" expanded (select the arrow to the left of the app name to expand/collpase the list of "child apps").
Disable Apps
Rather than removing an app you suspect may be causing an issue with your hub or device, you can simply disable it to see if the problem is resolved.
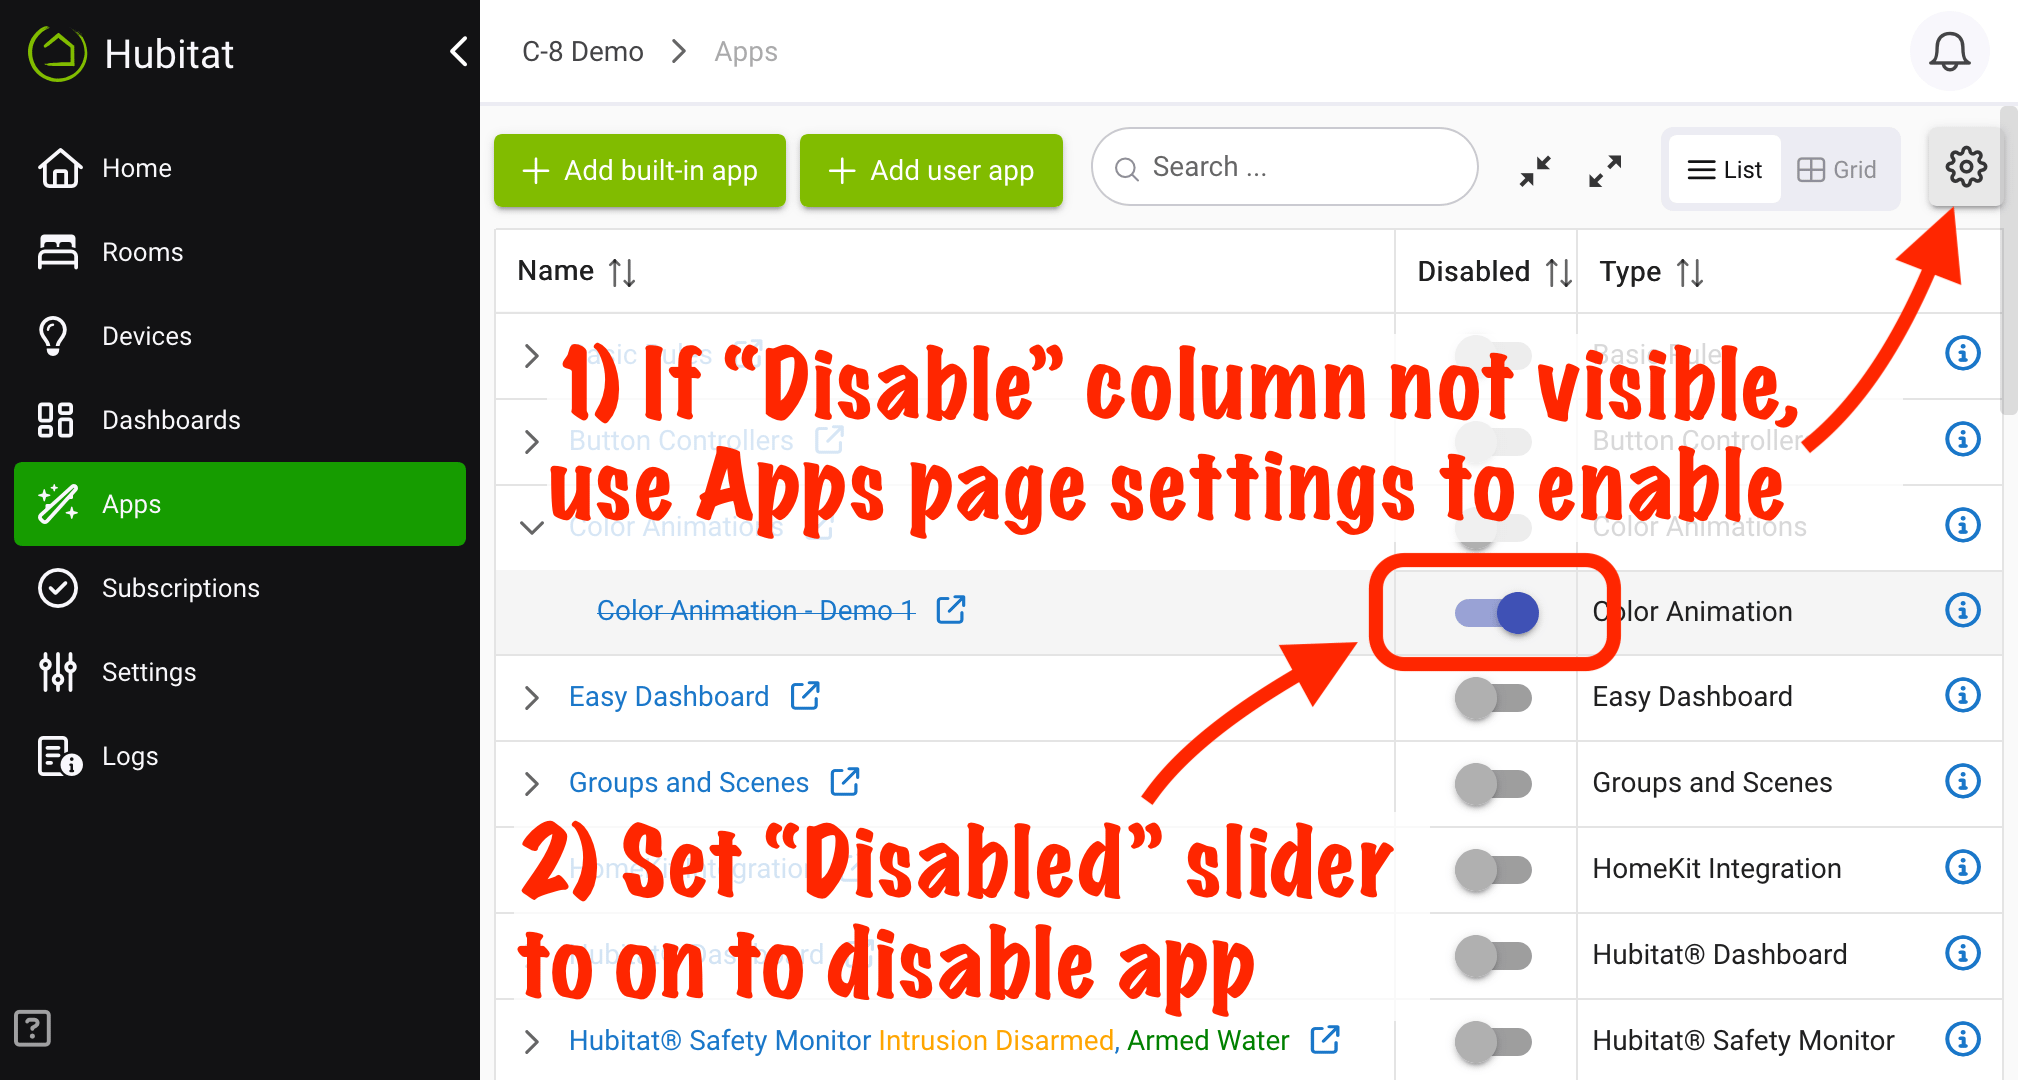
- If the Disable column is not visible, use the Display settings icon to enable it.
- Check the box next to the app name to disable that app.
- A checked box means the app is disabled
- An unchecked box means the app is not disabled (default)
Disabling an app prevents any app code from running. Disabling a parent app will not disable child apps (but may or may not affect their operation in other ways).