Hub Mesh
Share devices from one hub to another over your LAN (a built-in utility for users with multiple hubs)
Hub Mesh
When two or more Hubitat Elevation hubs run on the same local network, you can easily share and use devices in automations among multiple hubs with Hub Mesh. Using a simple "share and link" setup, all participating Hubitat Elevation hubs are able to effortlessly control and stay in sync with devices and (optionally) mode changes or hub variables from one hub on another hub. Events, commands, etc. are seamlessly shared among the hubs for selected devices.
NOTE: Hub Mesh is not available on hubs running a platform version prior to 2.2.4 (the platform version is listed in Settings > Hub Details and can be updated in Settings > Check for Update). It is recommended to keep all Hub Mesh hubs on the same platform version (e.g., as of this writing, version 2.3.4.138 is not compatible with earlier versions and release 2.3.6 will likely not discover older firmware versions), though this is not always required.
Configuring Hubitat Hub Mesh
-
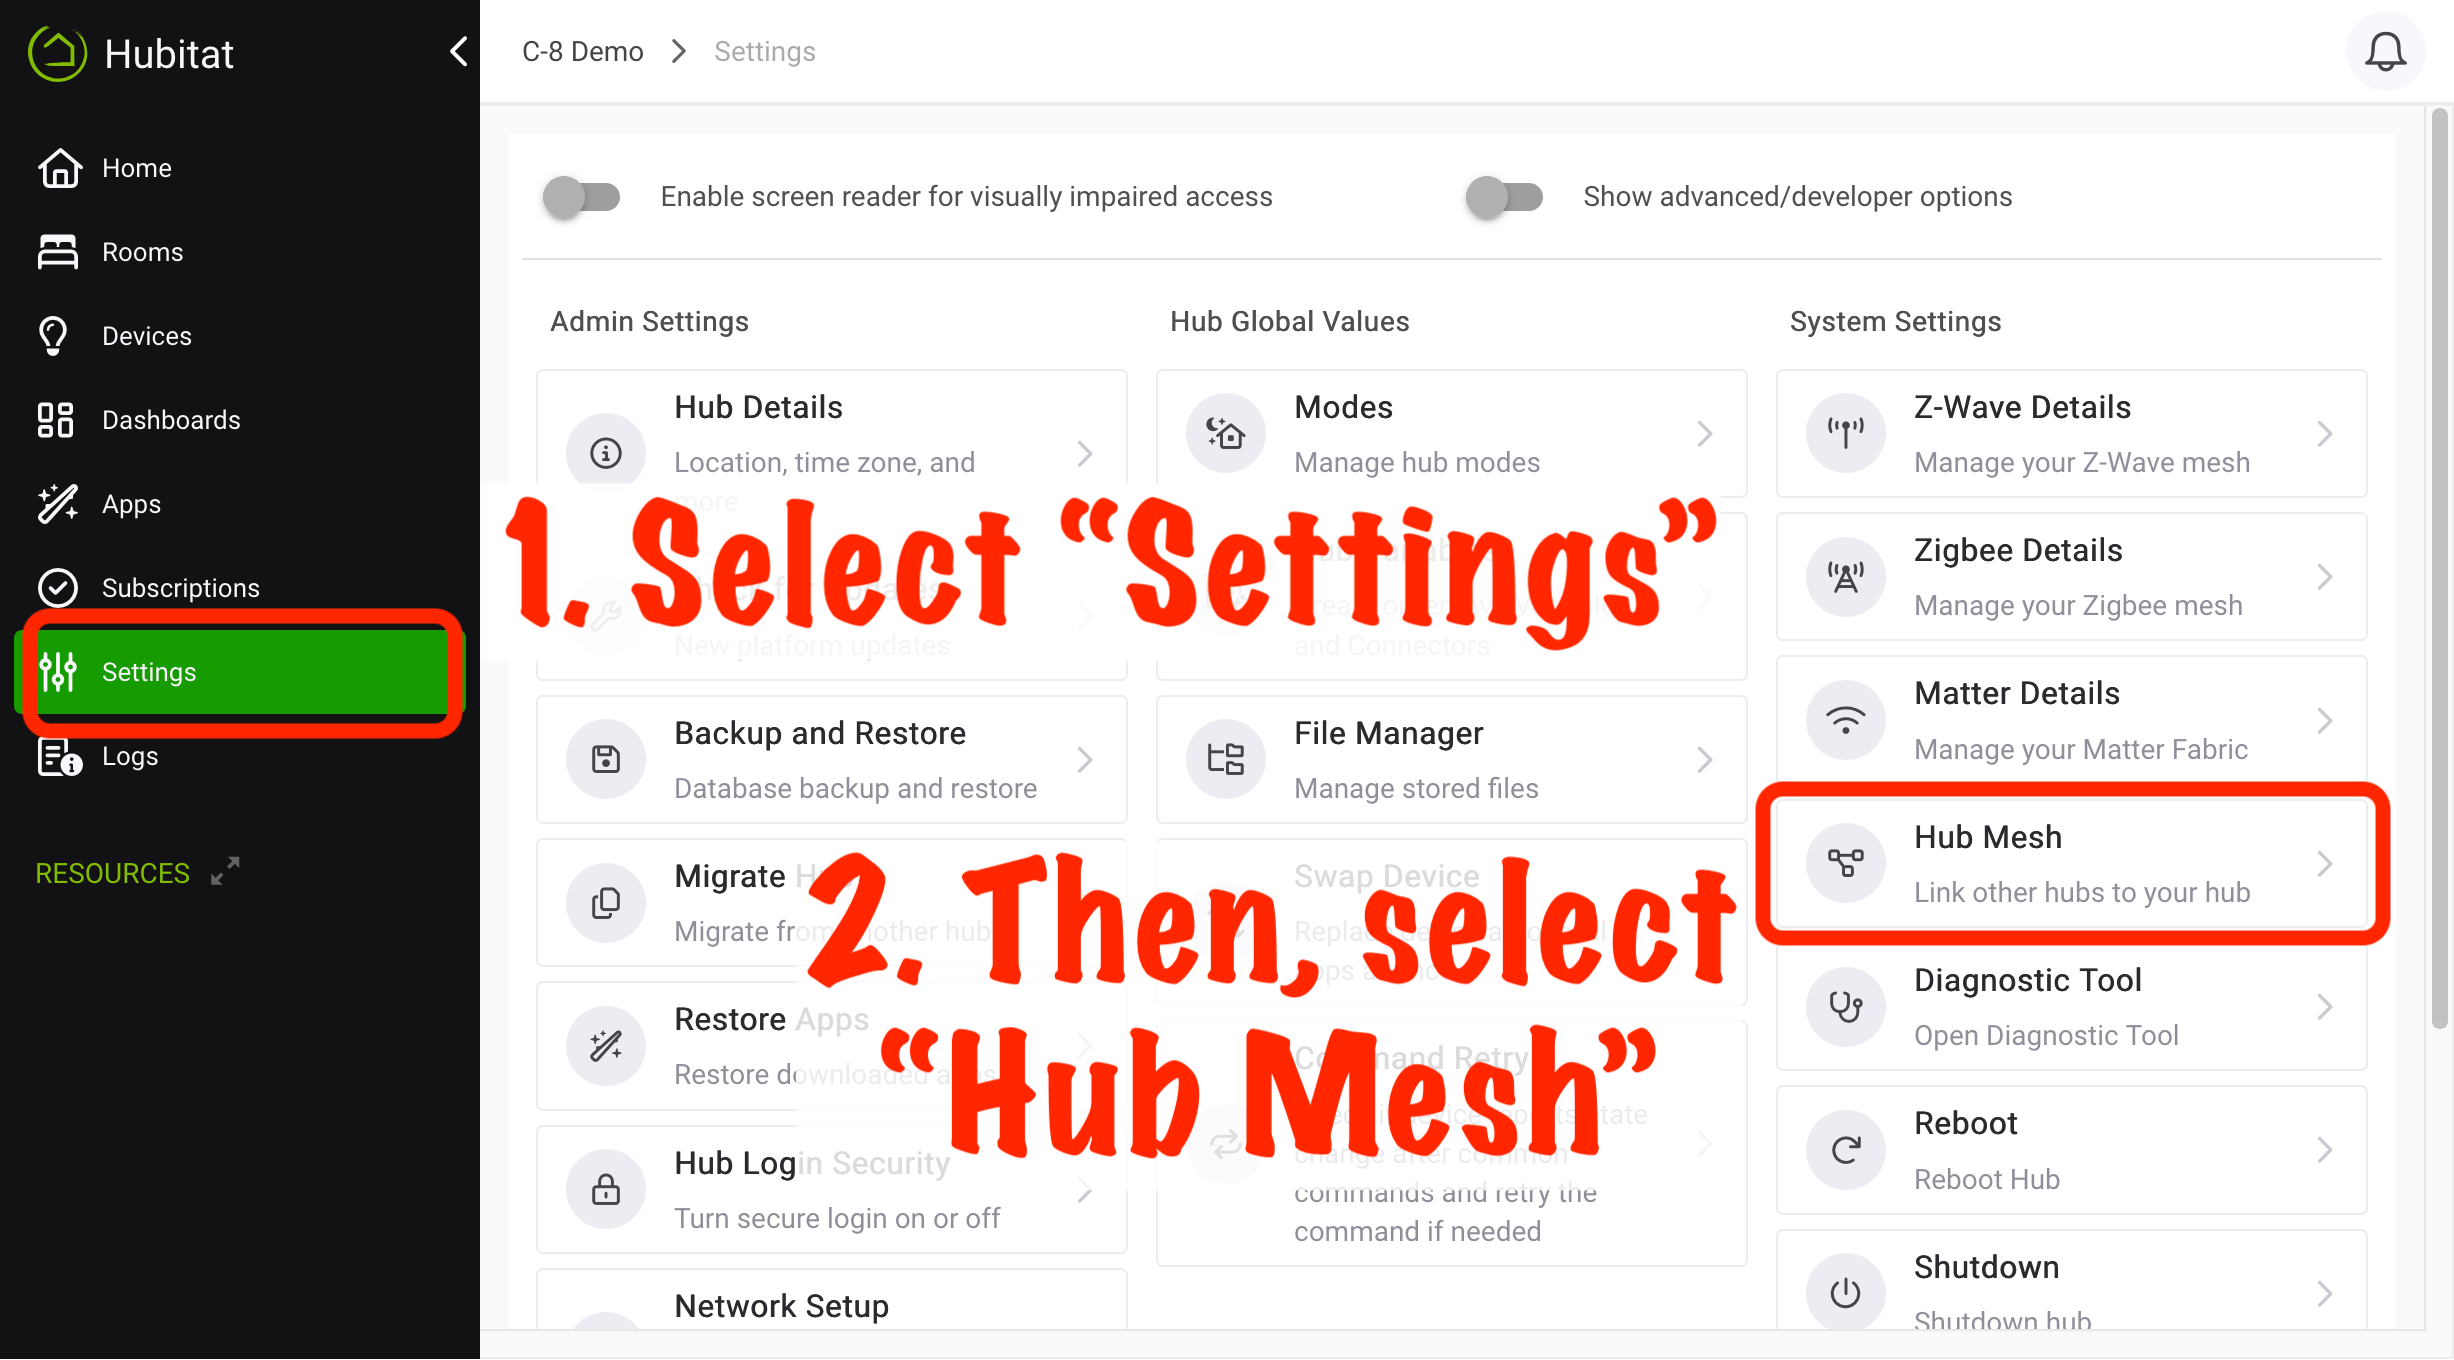
From the Hubitat Web Interface select Settings, then Hub Mesh.
-
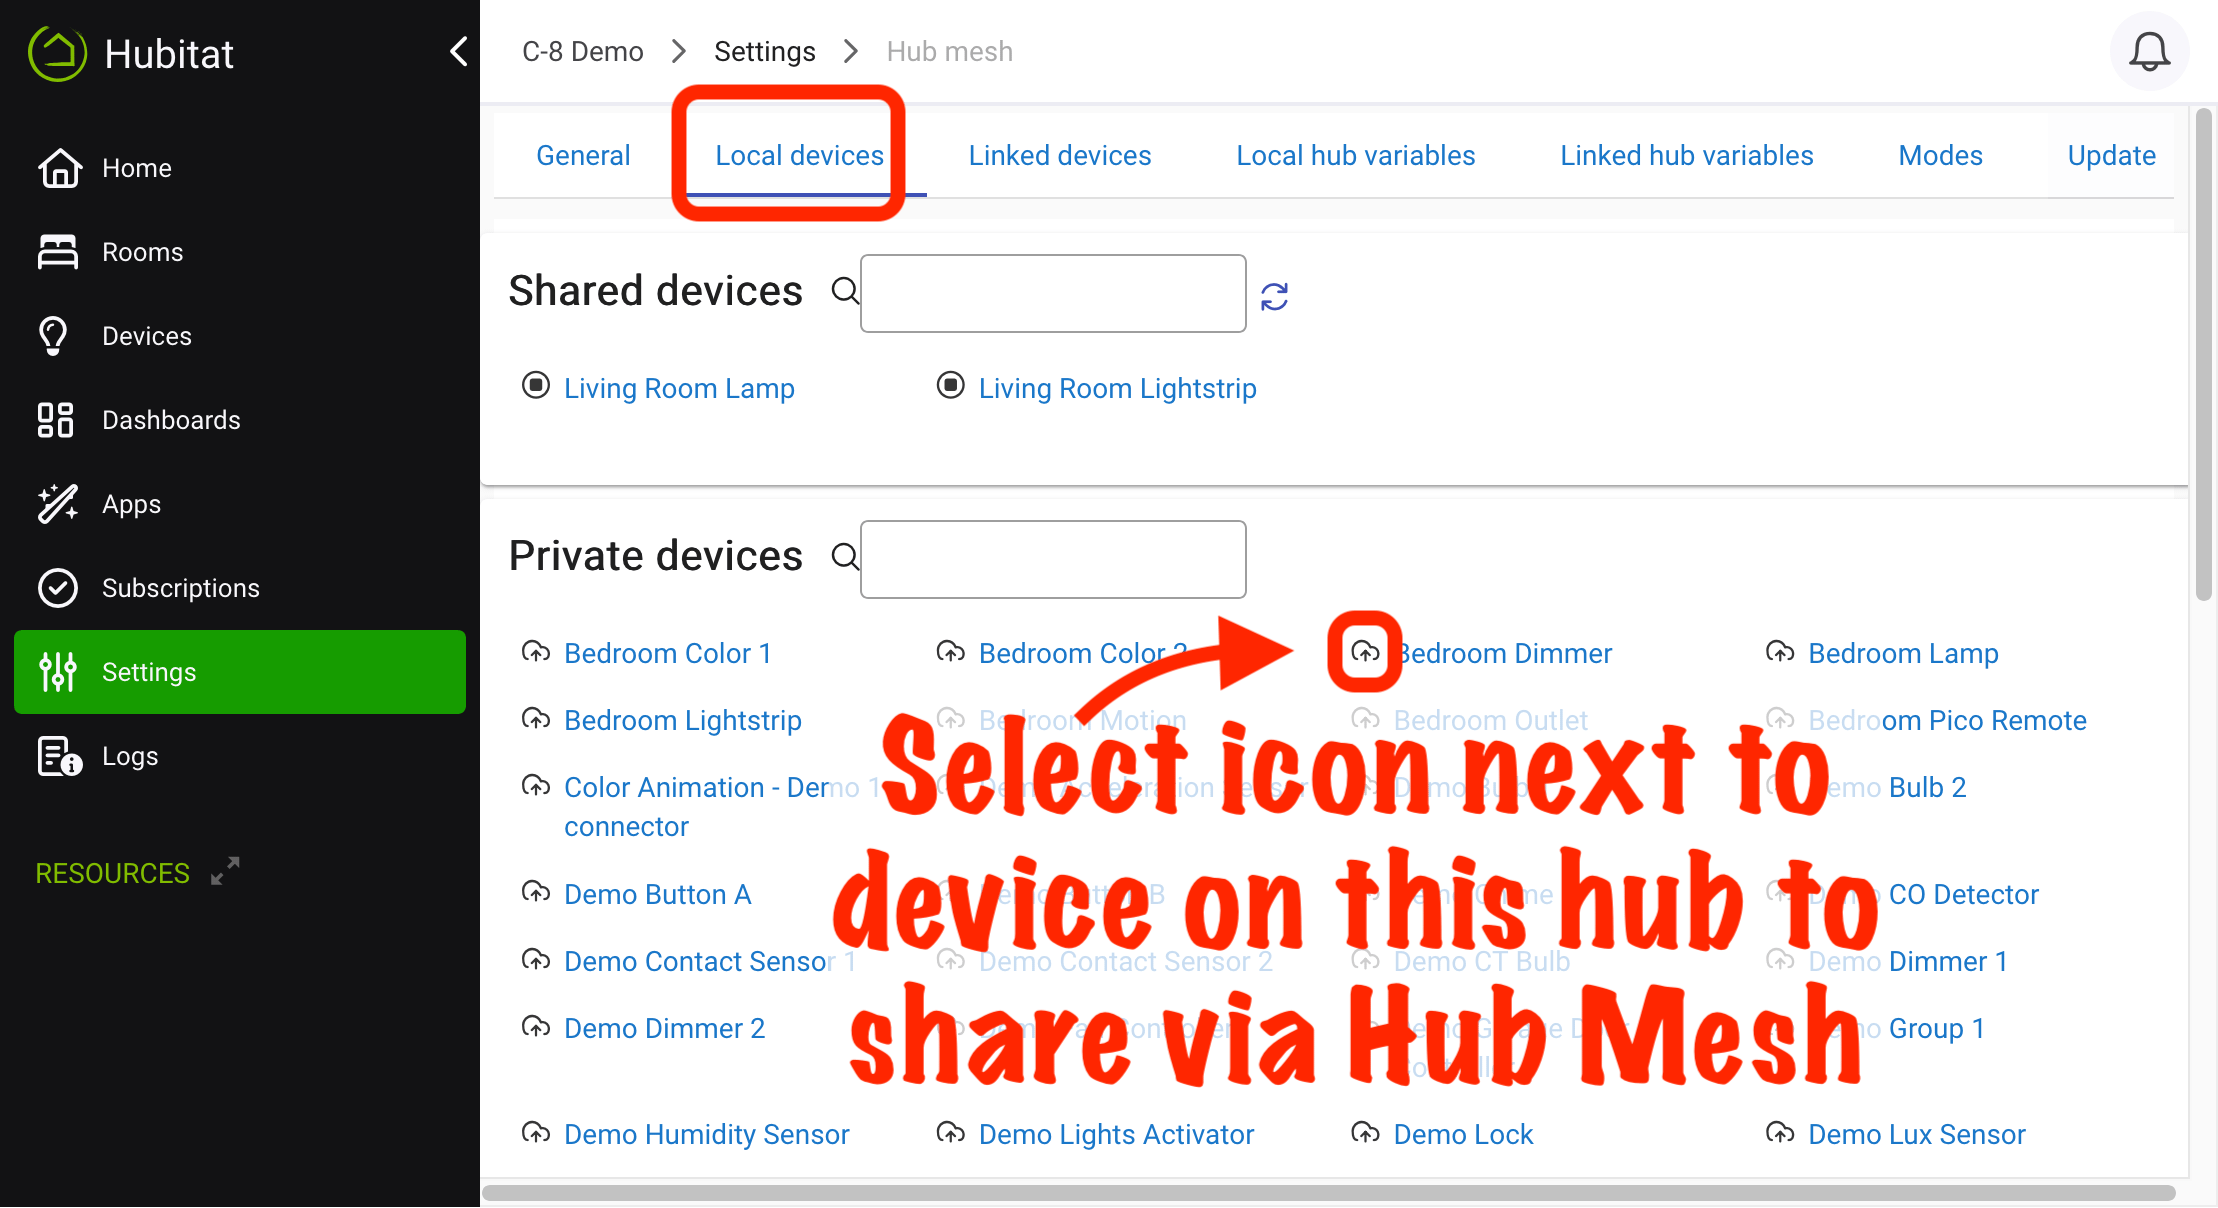
To share a device from the current hub with other hub(s), select the Local Devices tab. Select the small "up" icon next to a device to share it with Hub Mesh.
-
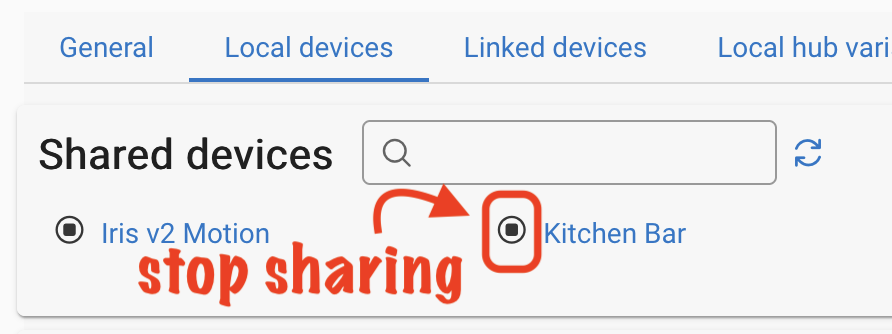
Devices that have been shared will appear in the Shared devices list at the top of the Local Devices tab. Selecting any of the device names in the list will take you directly to the settings page of that device. Select the "stop" icon to the left of any device to stop sharing that device via Hub Mesh.
-
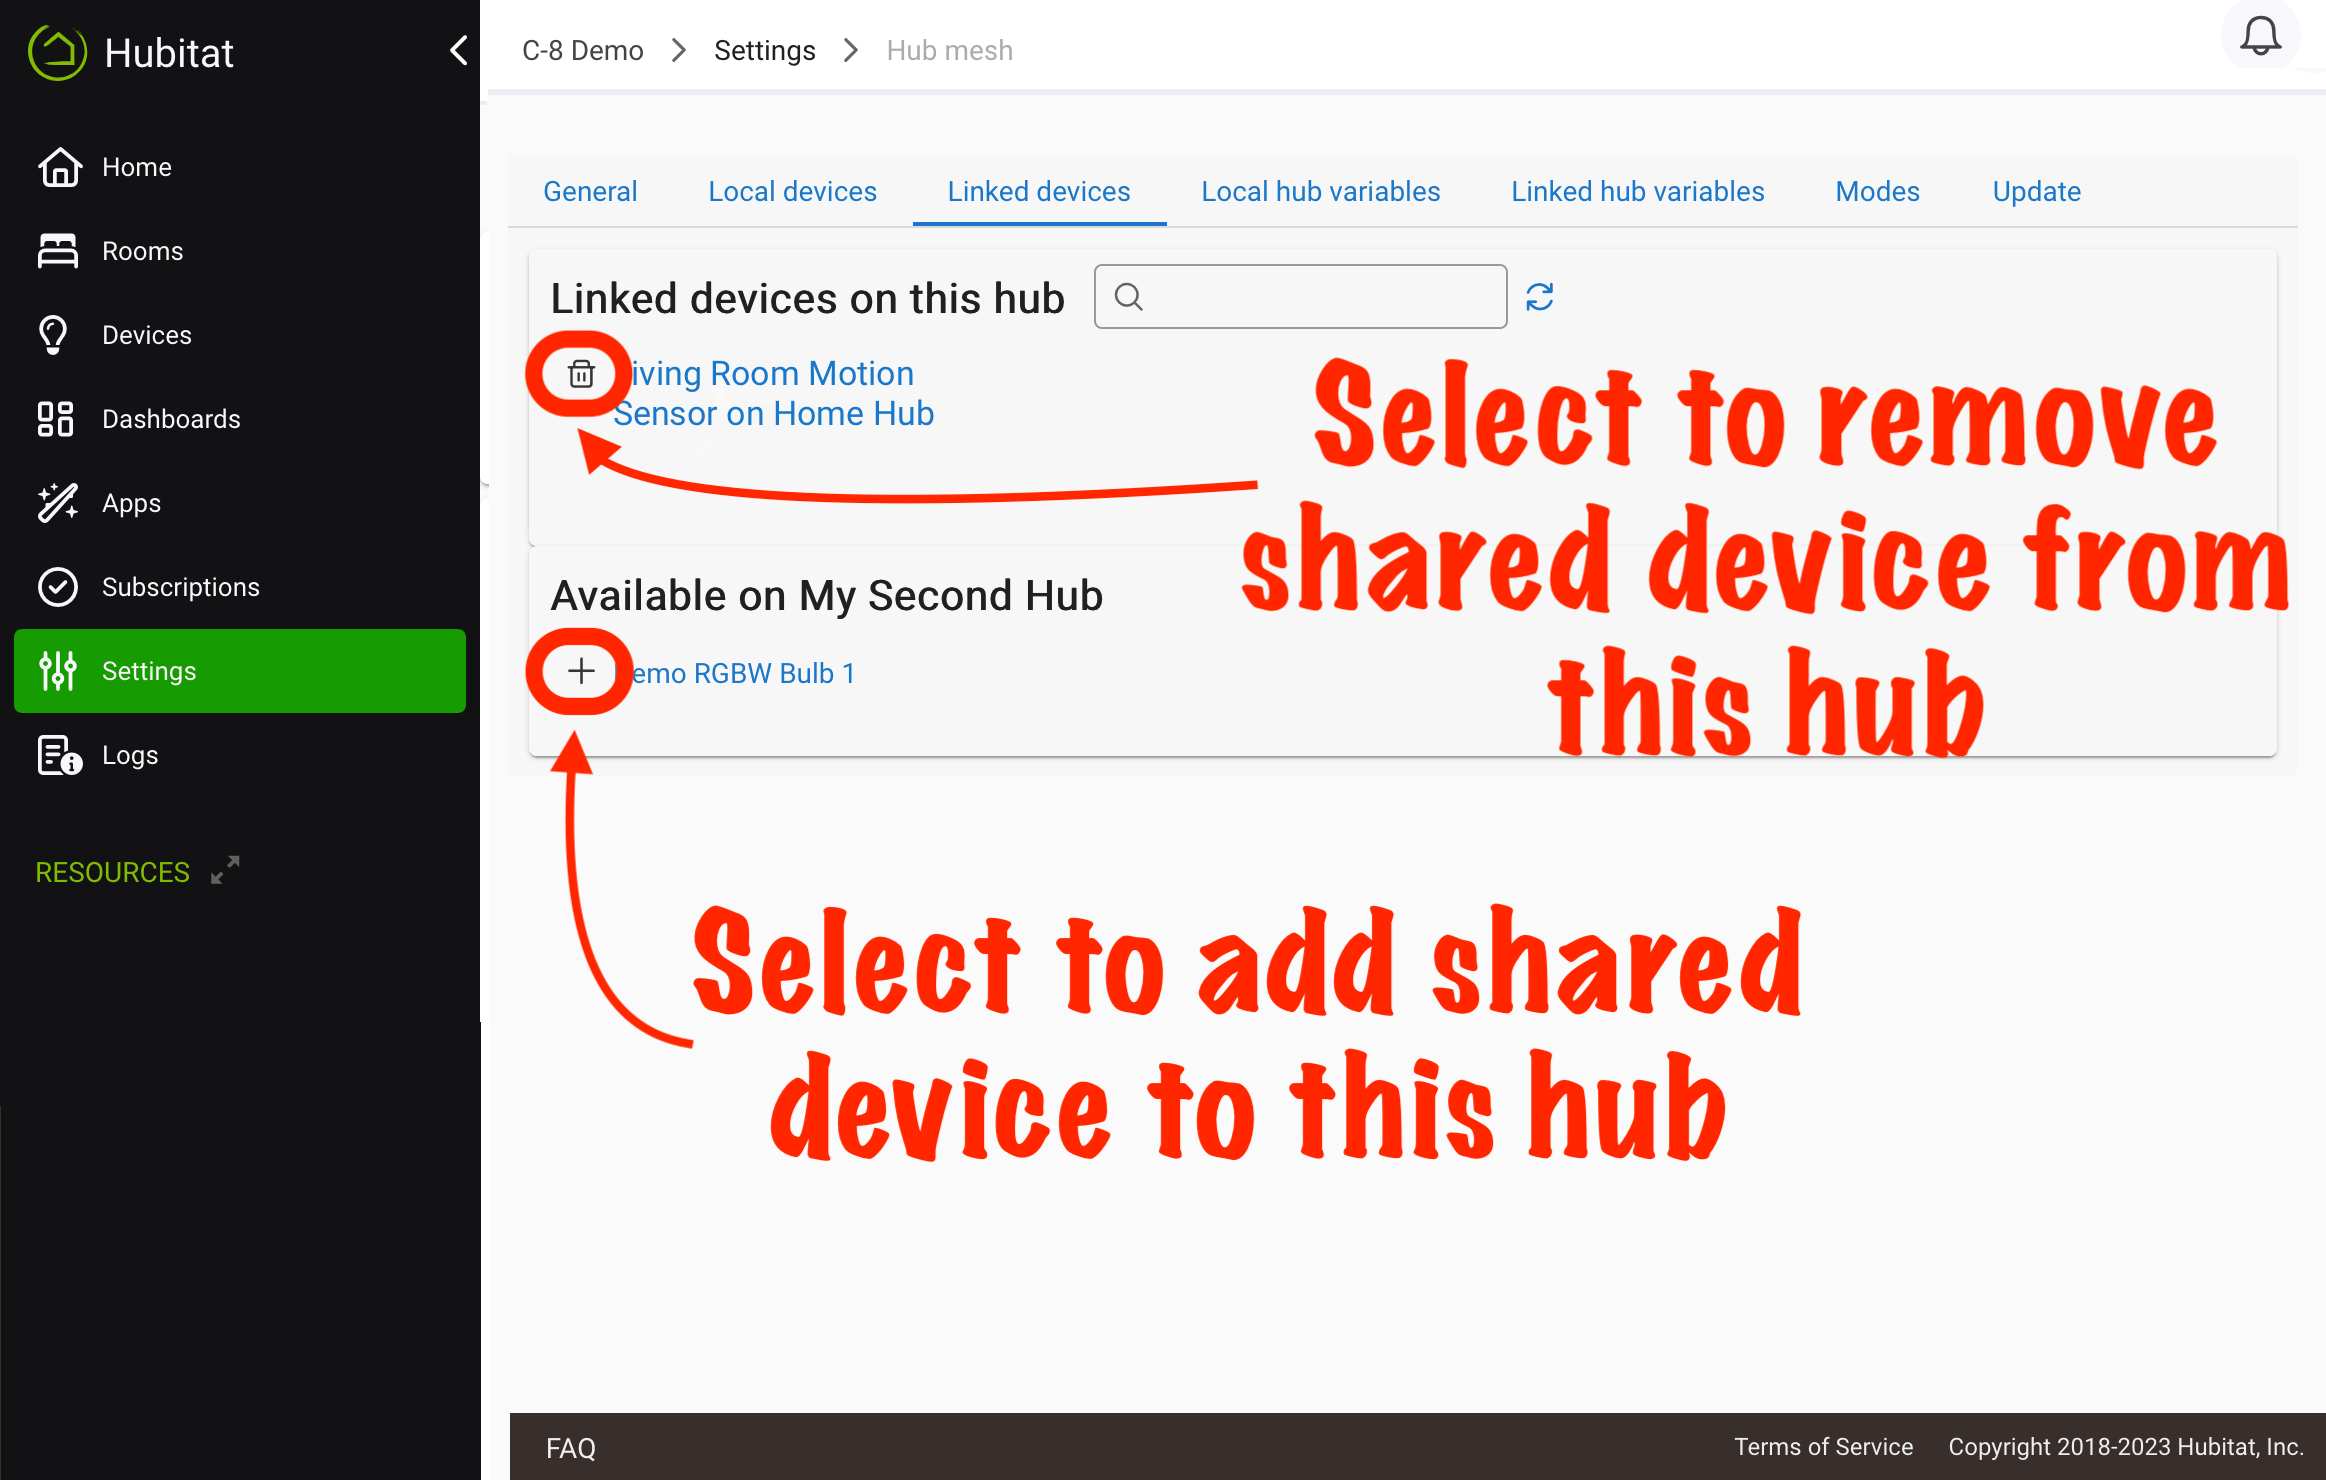
On another hub where you would like to link to devices shared in Hub Mesh, navigate to Settings > Hub Mesh and then select the Linked Devices tab. If your shared devices do not show up in the remote devices list, refresh your browser or use the "refresh" (arrows icon) towards the top of the Linked Devices page. Select the "+" icon next to a remote device (under Available On Hub Name) to add it to this hub, or select the trash icon next to a shared device that was added (under Linked devices on this hub) to remove it from this hub.
-
Links from shared Hub Mesh devices will be created in the devices list of the hub linking to them. Multiple hubs can link to devices shared through Hub Mesh.

- NOTE: Device Preferences and Information changes will update on the linked device after 1 minute, but they cannot be changed from the linked device.
- You may also add a single device to Hub Mesh by simply turning on the Hub Mesh enabled option on the Device Detail page of the device you wish to share with other Hubitat Elevation hubs.
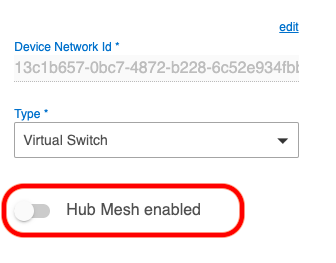
NOTE: To actually add the shared device to other hubs, you will still need to use the Linked devices tab on the hub where you want the linked device to be added, as described above in Step 4.
- Devices which were linked to other hubs will not be deleted when they are removed or unavailable to Hub Mesh, but will instead switch to a Disabled state. If you add them to the mesh again or the hub which was sharing them returns to Active status, the linked devices will be automatically re-enabled.
NOTE: If you no longer want a Hub Mesh Linked Device in your device list, it must be manually removed.

Hub Name on LAN
If you have multiple hubs, it is recommended to set a unique LAN name for each. This is done with the Hub Name on LAN in Settings > Hub Details.
Sharing Hub Variables
Hub variables can be shared in a manner similar to devices. Use the Local hub variables tab to share variables from the current hub via Hub Mesh, and used the Linked hub variables tab to add devices to the current hub that have been shared from other hubs.
Follow Modes
You can set Hub Mesh to follow Mode changes of other hubs by using the Modes tab.
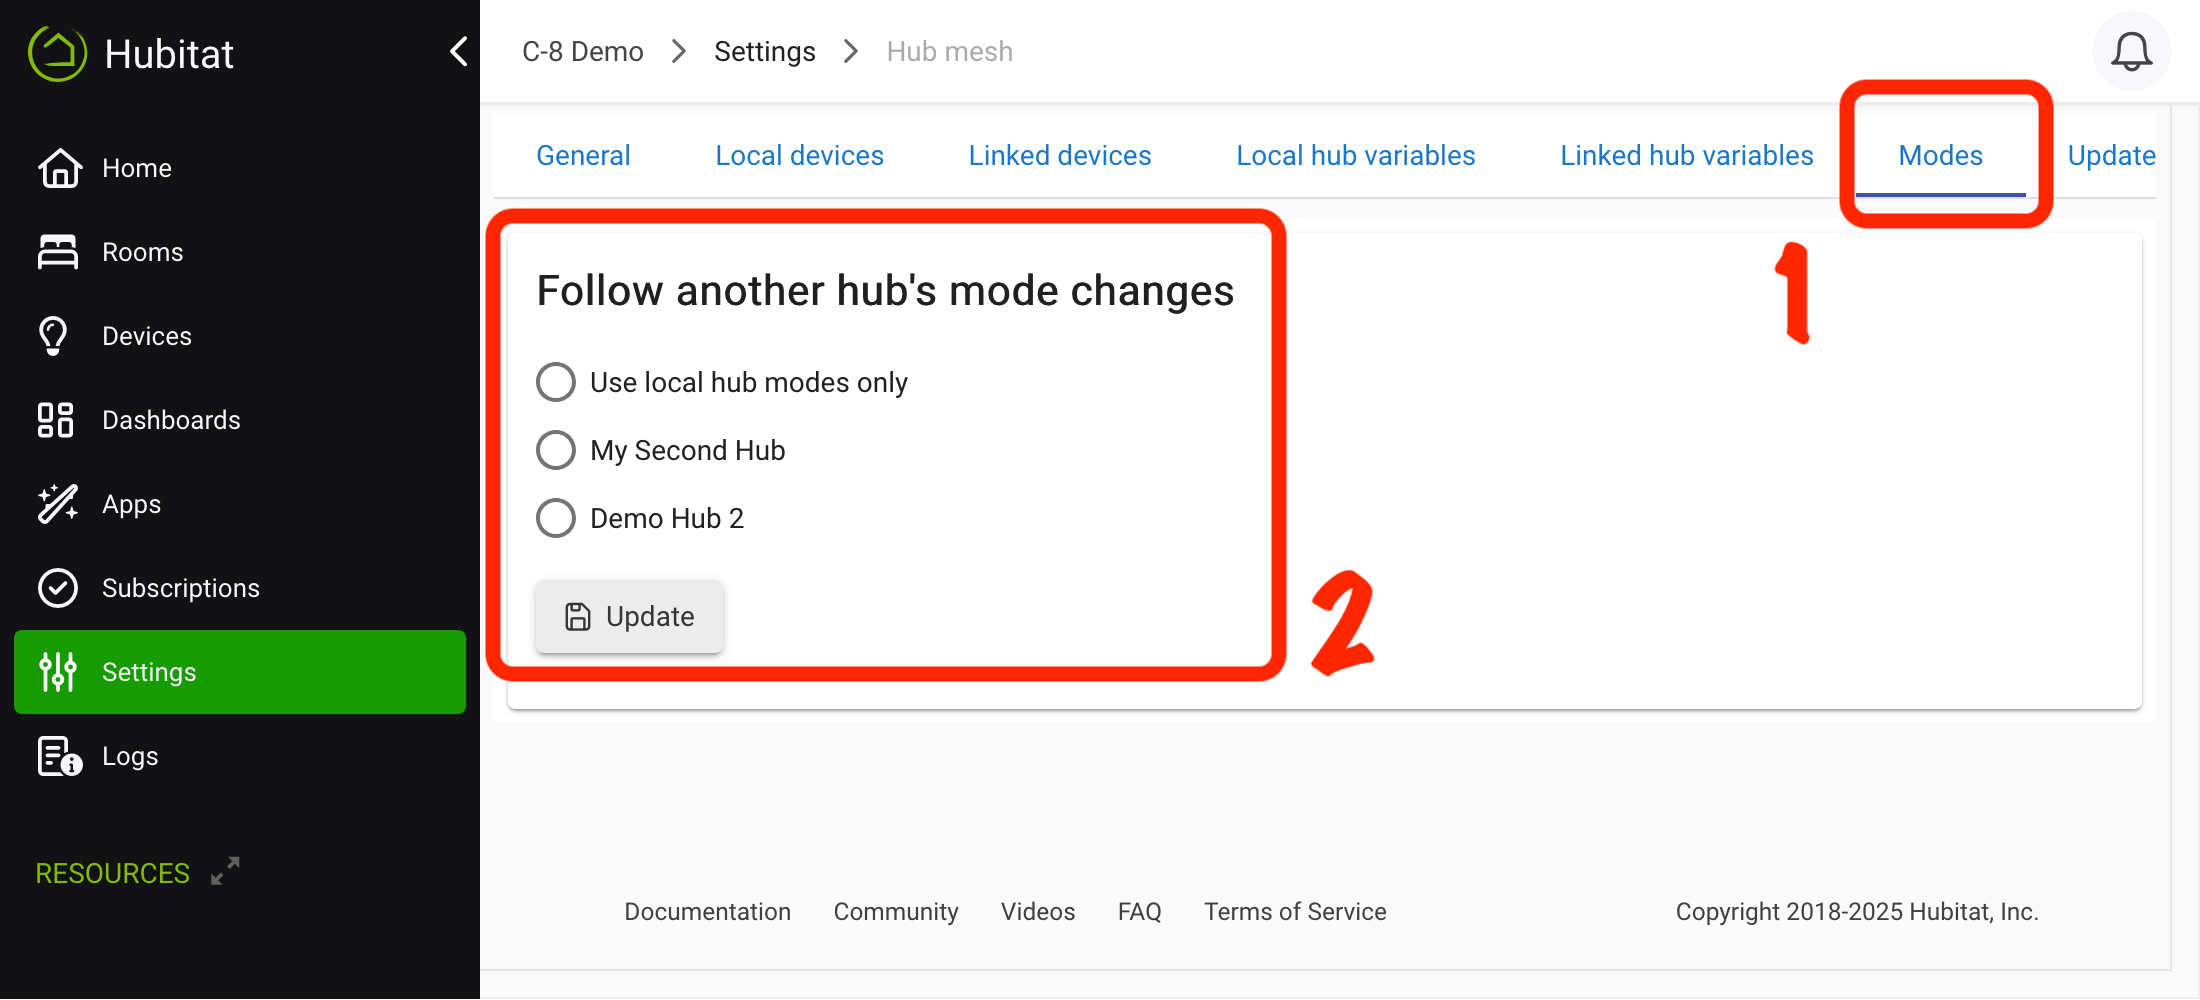
IMPORTANT: If you have Mode Manager installed, you should uninstall it from hubs participating in Follow Modes. This prevents conflicts between the “follow modes” feature of Hub Mesh and Mode Manager on the current hub and prevents mis-matches of current modes among Hub Mesh hubs. (This applies to any app, including rules, that may also change modes on this hub.)
Using Hub Mesh with Hub Login Security
When Hub Login Security is enabled on the hub from where devices are shared, it is necessary to provide the linking hub with a security key. Failing to do this will result in linked devices that do not synchronize with the sharing hub.
-
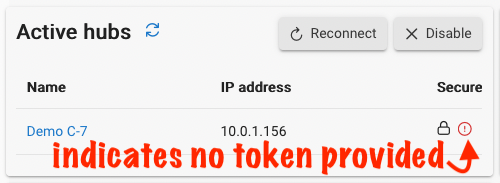
With Hub Login Security enabled, a lock icon will appear next to the Active hubs list. This will show a warning with an exclamation mark icon when the security key from the sharing hub is not available to the linking hub.
-
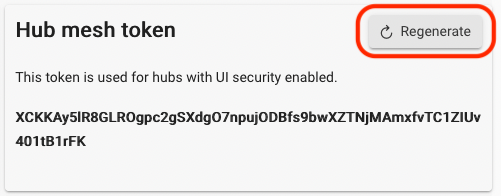
Copy the security key from Hub Mesh settings on the sharing hub. If one has not been set or it needs to be updated, select Regenerate:
-
In the Active hubs list, select the exclamation mark warning icon next to the hub with login security enabled, and enter the key from the other hub from the previous step:
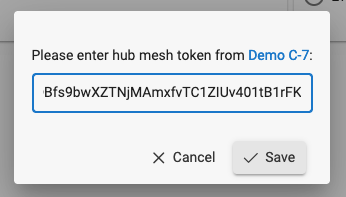
-
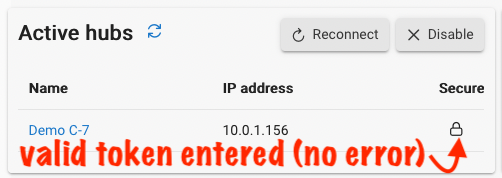
Once a valid key from the sharing hub has been entered, the warning icon will disappear and device synchronization will resume. If the warning icon does not disappear in the Active local hubs list, refresh your browser.
Full remote device sync
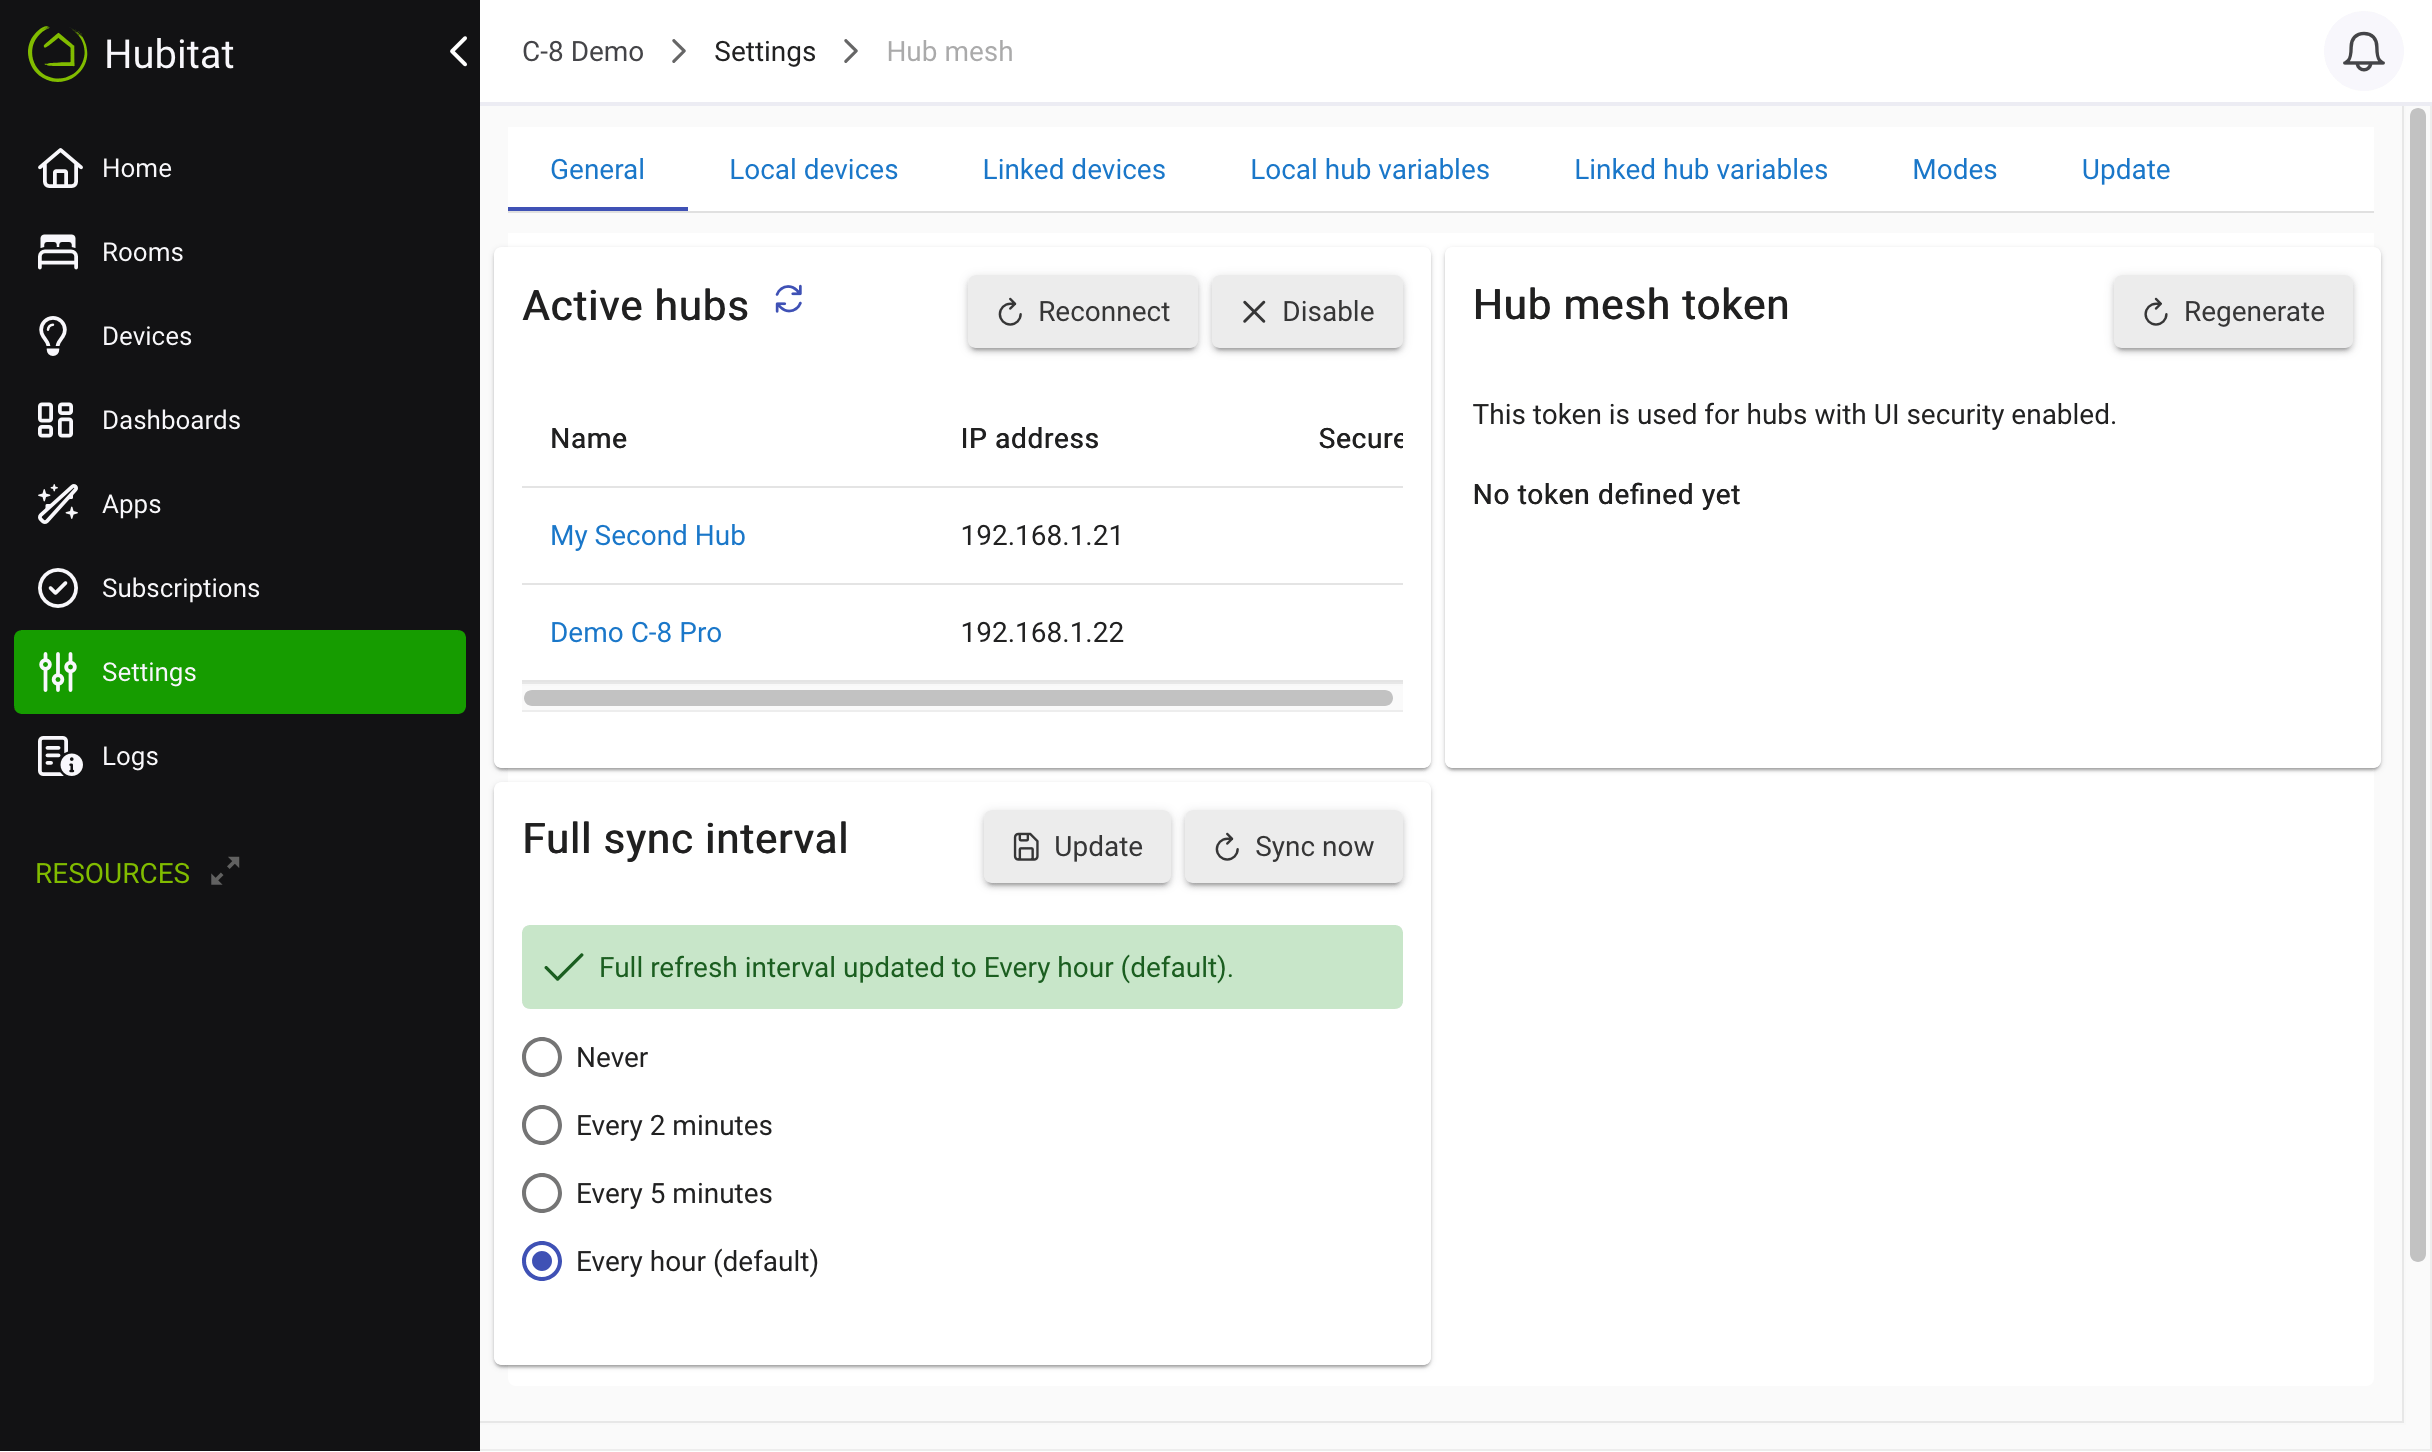
- When more than approximately 200 devices are shared in a Hub Mesh, there may be concern over the increased amount of network traffic and load on the source hub. You may therefore disable or extend the amount of time before a Full remote device sync is performed.
- You can also completely disable synchronization by selecting Never. An example of how this might be used is when controlling a light from the destination hub, but you are only concerned about status updates on the source hub. This setting will stop all shared device synchronization from the source hub.
Swapping Hub Mesh devices
You can easily swap a Hub Mesh device on one hub with a different Hub Mesh device. To do this, navigate to the device detail page for the Hub Mesh device on the linked hub (the hub to which the device is shared). Then, scroll down to the Device Information section and locate the dropdown currently displaying Keep current device link. If other Hub Mesh devices are available to swap with, they can be selected from this list.
(Use caution if the Hub Mesh device is a parent device with child devices in use on this hub.)
Swapping Hubs
If you restored a backup from one hub using Hub Mesh to another hub and now your other hub(s) do not recognize the "new"/restored hub, use the Update tab at the top of the Hub Mesh screen. Select the old hub under Source hub, the new hub under Destination hub, and then select Migrate. All Hub Mesh devices pointing to the old (source) hub will now point to the new (destination) hub.
Hub Mesh FAQs
- If I use custom drivers on the "source" hub, does the custom driver also need to be installed on the remote hub? No.
- Does Hub Mesh extend the range of a Z-Wave or Zigbee network if I enable the feature on multiple hubs? No, Hub Mesh is a way to share devices (and certain hub events) from one hub to another over your LAN. Hub Mesh has no awareness of the underlying device protocol, whether Zigbee, Z-Wave, Matter, LAN, cloud, or virtual. Each hub would still have its own Z-Wave and/or Zigbee network(s) and Matter Fabric(s), just as it would with or without Hub Mesh in use. The use of the word "mesh" in the name of this feature is unrelated to the fact that Zigbee, Z-Wave, and Thread utilize a mesh network.
- One of my Hub Mesh hubs cannot see other hub(s). What can I do? Verify that all hubs are running the same platform version (recommended, though not always required). Ensure that your home network is set up such that all hubs are in the same broadcast domain. Hub Mesh uses mDNS for discovery and TCP for communication (previous versions used TCP or UDP) over port 8083. For the fastest and most predictable outcomes with mDNS, it is also recommended to ensure each hub has a unique Hub Name on LAN in Hub Details.